We can probably all agree that desktop gaming PCs represent the pinnacle of gaming performance. However, not everyone wants, or has the space for, a hulking great machine on their desk.
That's where mini-ITX comes in, allowing for top-notch performance in a form factor that's much easier to live with. You get all the same benefits as a full-size gaming rig, including the ability to upgrade easily in the future, all in a case that's close to the size of an Xbox.
Typically, full-size builds are a little easier to put together, simply because there's more room for all of your components and for that reason, the mini-ITX realm is often reserved for more experienced builders and enthusiasts.
For first-time builders, you might have an easier time with our how to build a mid-range gaming PC or extreme gaming PC guides. That said, we can't imagine most people would have too much trouble with the build that we're outlining today and if you're up to the challenge, read on.
|
Index |
|
Budgeting your mini-ITX gaming PC
As with any PC build, it's crucial to have a budget in mind before you start your mini-ITX adventure. For this guide, we'll be working on an upper mid-range build that's capable of serious gaming but it's easy to pick and choose what will suit your needs best. For example, maybe you need a lot more storage but aren't as interested in graphically intensive games. Then you could allocate more of your budget into SSDs and buy a less expensive graphics card.
The beauty of building your own PC is that you can swap out parts as and when you need to upgrade. With graphics card prices and availability presenting a particular challenge at the moment, it's not uncommon for people to build a system without a graphics card with the aim of adding one later down the line.
With that said, it's still important to get the core components right the first time around. We recommend paying particular attention to the motherboard and CPU as these are the hardest to swap out.
What components do you need?
When it comes to building a mini-ITX machine, size is obviously a key factor. For that reason, we recommend starting out with your case choice and working out the rest of your system from there. It will be important to check the measurements of your components, particularly large ones such as the graphic card, to ensure they can squeeze into your chosen chassis.
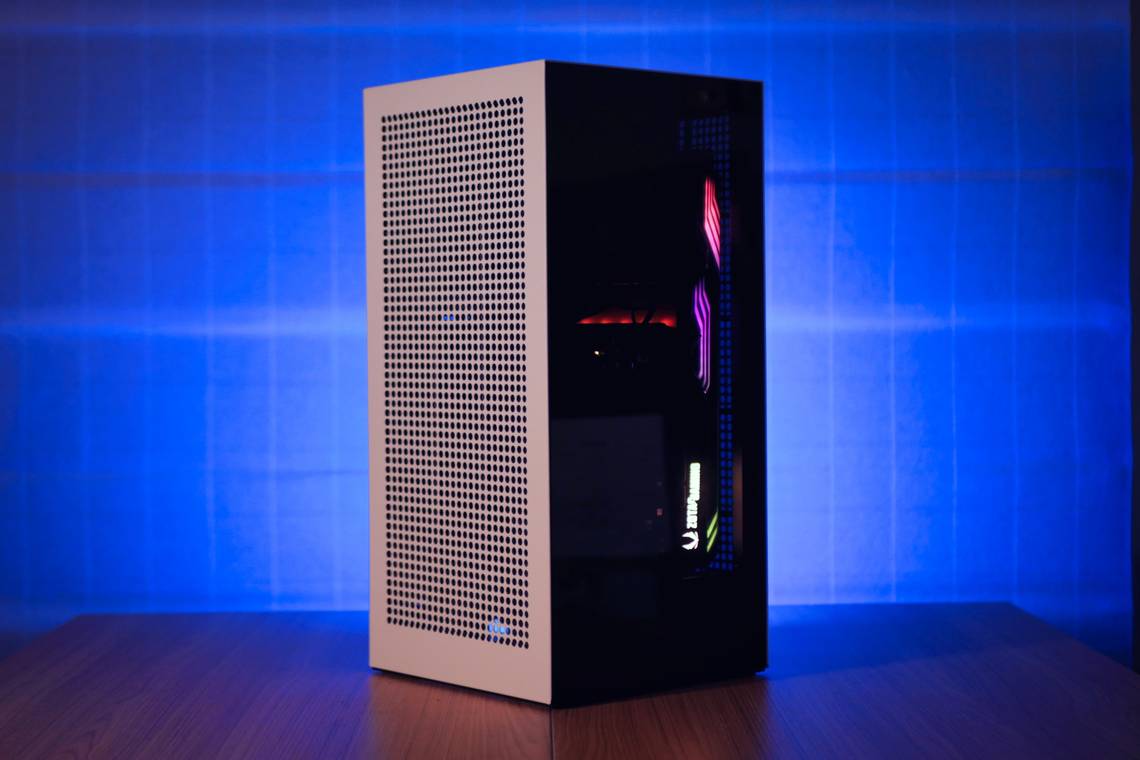
Case - NZXT H1 V2

For our system, we'll be using the second generation of NZXT's H1 case. It may seem a little pricey at first glance, but that's because it comes with a 750-watt power supply and AIO liquid-cooler in the box. When you consider what they would cost you separately, it's actually not bad value at all. Plus, it makes for one of the easiest mini-ITX builds we've ever attempted, since all the cables are the correct length and partially managed right out of the box.
The H1 V2 retains the Xbox Series X style form factor of the original H1, whilst improving thermal performance, beefing up the PSU and allowing extra clearance for massive graphics cards. It's quite the looker too, in our opinion.
There are loads of options for mini-ITX cases on the market, but after our experience building in the H1, we'd highly recommend seeking out an option with an included PSU. It makes cable management so much easier and cuts hours off the build time.
Motherboard - Gigabyte X570 I AORUS PRO WIFI

For the motherboard, we have selected Gigabyte's X570 I AORUS PRO WIFI. Not only does it offer great value for money, but it also looks the part and is feature-packed to boot.
It's got high-end features such as reinforced PCIe 4.0 and memory slots, an actively cooled M.2 heat spreader, a built-in I/O shield and a beefy extended heatsink. Alongside cutting-edge features like Wi-Fi 6, Bluetooth 5, PCIe 4.0 and USB 3.1 gen 2. All packed onto the tiniest of circuit boards.
Remember when choosing a motherboard to be careful with both the CPU compatibility and the connectivity on offer. There's nothing worse than completing a build and realising that you don't have enough USB ports.
Gigabyte I Aorus Pro AMD X570 AM4 Mini ITX DDR4-SDRAM Motherboard
CPU - AMD Ryzen 5 3600XT

We'll be using AMD's Ryzen 5 3600XT as the brains of our machine. It's a solid mid-range performer with 6 cores and 12 threads, it'll handle light video editing without breaking a sweat and, when paired with a decent GPU, is more than enough to play the latest triple-A games on high settings.
If you'll be gaming exclusively, you could cut some costs here and still get excellent performance. Whereas, if you're more serious about content creation you could bump it up to a Ryzen 7 to cut down your render times.
AMD Ryzen 5 3600XT 6-core, 12-threads unlocked desktop processor with Wraith Spire cooler
GPU - ZOTAC RTX 3070 Amp Holo

This RTX 3070 from ZOTAC is one of the coolest looking cards of the bunch, as you'd expect, it's quite the performer too. The twin fan cooler leaves us plenty of room in the H1's GPU chamber and the RGB lighting should give us something nice to look at through the tinted glass window.
We went for the 3070 in order to get the maximum performance possible, without over-stressing our 750W power supply. ZOTAC's specification recommends a minimum power supply wattage of 650, so we've got boatloads of headroom for our other peripherals too.
Buying a GPU is no easy feat these days, but with some persistence and a bit of hunting, there are still deals to be had. Keep a keen eye on restock dates and you should be able to find an equivalent without resorting to resellers.
Memory - XPG Spectrix D45G 3600MHz

With a clean industrial finish and a prominent diffused RGB lighting bar, the Spectrix D45G is one of the most attractive memory kits to ever grace our desk. Beyond looks, it's competitively priced and speedy at 3600MHz. Our 16GB (two sticks of 8GB) configuration should be plenty for multi-tasking, light video editing and, of course, gaming.
This is another area that's easy to tweak for your specific needs, so, if you'll be spending all day in After Effects churning out animations then feel free to bulk up the memory. For most users, however, 16GB seems to be the sweet spot where value and performance intersect.
XPG GAMMIX D45G RGB DDR4 3600MHz 16GB (2x8GB) 288-Pin SDRAM PC4-28800 Memory Kit (AX4U36008G18I-DCBKD45G)
Storage - Samsung 970 EVO Plus NVMe SSD

NVMe is where it's at these days, not only do you get blazing fast read and write speeds, but also a clean wire-free install that's perfect for small form factor builds. Samsung's reliability is essentially unmatched when it comes to SSDs, that's why we've gone for the 970 EVO Plus as our boot drive.
There are plenty of cheaper drives out there and faster ones too, but the 970 EVO Plus is one that we trust to keep our rig going for many years to come.
Just like with memory, storage is another area where configurations can vary wildly. Maybe you only need a 500GB SSD for your essential games or maybe you're a data-hoarder that needs 12TB of HDDs for your ever-expanding movie library. Whatever the case, we reckon the 970 EVO Plus is a solid choice for a boot drive and it's super easy to add or take away additional storage as necessary.
MZ-V7S500BW
How to build your mini-ITX gaming PC
With any PC build, and particularly when it comes to small form factor builds, it's best to get as many components installed on the motherboard as possible before installing it into the case. Usually, this means the CPU, RAM and NVMe SSD.
Everyone hates manuals, but for a PC build they're essential. Particularly the case and motherboard manual, so, keep them handy and let's get into it.
Installing the CPU
Installing the CPU can be nerve-wracking as it's an expensive and fragile little thing, but it's actually very easy to do.
First, lift the little metal lever by pushing it gently to the side and lifting upwards. Then align your CPU so that the little golden arrow in the corner matches with the arrow on the bottom-left of the CPU socket.
Gently lower the CPU pins into the socket, be sure not to twist it at all and you shouldn't need to apply any force. Once it's properly seated, lower the lever and tuck it back under its retention tab.
That wasn't so bad, was it?
Installing the RAM
On mini-ITX motherboards, this is easy as can be. Since you'll be filling all the slots, you don't have to worry about which stick goes where.
Begin by releasing the latches on all corners of the RAM slots. Then, align the memory stick with the notch in the slot, it can only go in one way around.
Once you're confident it's in the right place, apply firm and even pressure to the top of the RAM stick. You should hear a satisfying click as the latches snap into place.
Finally, double-check that all the latches are secured before moving on.
Installing the NVMe SSD
We'll be using the M.2 slot on the rear of the motherboard for our SSD, as it will allow us easier access for later upgrades. However, if you want additional cooling, we'd recommend using the cooled mount found on the front of the motherboard. Either way, the process is very similar.
Once you've located your M.2 slot, take out your screwdriver and remove the retaining screw.
Then, align the SSD with the socket, this too is notched and can only go in one way around. Usually, the SSD's logo will be facing outwards.
Insert the SSD at an approximately 45-degree angle, don't force anything, it should go in quite easily.
Push the SSD downward so that it lays flat against the standoff, and re-insert the retaining screw to keep it in place.
Preparing the case
The H1 case is very unique in its construction, but NZXT has done a great job in clearly marking things to make it as straightforward as can be.
To access the internals, pull off the glass and rear panels by lifting from the marked area at the bottom. It can take a bit of force the first time it is done.
Once removed, you can slide the metal shell upwards and off of the chassis, giving you 360-degree access to the internals.
Inside, you'll find an accessory box, remove this before continuing.
To gain access to the motherboard tray, we need to move the radiator. This too is clearly marked.
Remove the two screws at the top of the panel, then the radiator can fold out of the way.
Take both of the polystyrene blocks that secure the CPU cooler and remove them from the case.
Installing and connecting the motherboard
This part is a little trickier as it's where the size constraints of a mini-ITX case start to come into play.
In this case, we want the IO shield facing towards the bottom of the chassis, which is an unusual configuration. Normally, the IO shield would go towards the rear of the case.
Simply align the motherboard with the four standoffs, one will be located in each corner, and press the IO shield into its hole.
Then use the supplied screws from the case accessory box to fasten the motherboard to the case.
Next, we need to connect up the power supply, fan and front panel connectors. We won't go into too much detail here, it's a fiddly job but everything is labelled clearly. Consult your motherboard's manual if you get stuck.
The H1 case takes a lot of the hassle out of this step by having the cables routed to the correct location and at roughly the correct length. It's just a case of matching them up and connecting.
If you have any cables left over, don't worry, not all cables will be applicable to all builds. For our build, we didn't have anywhere to connect the USB 3.1 front panel header, meaning that the USB-C port on top of the case won't work unless we buy an adapter. Just be sure to tuck it neatly out of the way and it won't cause any other issues.
Now we need to connect our PCIe riser cable for the GPU. This is a lot like installing the RAM, first, we have to release the latch. Then, line up the PCIe insert and press it into the slot until the latch flicks into place.
Finally, use the velcro straps to tuck your excess cabling out of the way as neatly as possible. This is especially important in the H1 as we won't have much clearance between the radiator fan and the motherboard once assembled.
Installing the CPU cooler
Slide off the bracket that comes fitted on the CPU block, we'll be replacing it with one that's designed for AM4 motherboards instead.
It's best to pay close attention to the H1's manual in order to select the correct parts, but we'll be needing some screws, clips and a bracket.
Fasten the parts together as shown in the manual and slide the assembly over the CPU block paying close attention to the orientation.
Thankfully, the CPU cooler comes with pre-applied thermal paste so we can get straight on with the installation.
Carefully, position the CPU block over the CPU and attach the retaining clips to the plastic hooks on the motherboard.
Tighten the screws down with your fingers at first, then grab your trusty screwdriver in order to make them snug.
Try to apply even pressure on the CPU by tightening each side a couple of turns at a time.
Once the cooler is secured, we can close up the motherboard chamber by folding the radiator back up into position.
Take great care to ensure that the CPU cooler hoses don't get pinched on anything and that all cables are clear of the fan.
Once it's in place, reinsert the two screws we removed earlier.
Installing the graphics card
Now we need to move around to the rear of the case to get the GPU installed.
First, remove the two screws at the bottom, you can probably do this by hand, but use a screwdriver if they're a bit stiff.
Then, locate the PCIe power cables at the top of the case and pull them out to the side for easy access.
Release the latch on the PCIe riser cable, just as we did on the motherboard side, ready to receive the GPU.
Carefully align the graphics card with the PCIe slot and the slots on the bottom of the case and slide it into place.
Ensure that it's fully seated and that the latch clicks into position.
Then we need to connect the PCIe power cables. We actually found this to be the trickiest part of the entire build, but those with skinnier fingers will have a much easier time.
Once they're in place, use the two screws to secure the rear of the graphics card to the case. We found it easiest to flip the case on its front in order to see what we were doing.
And that's it, all of our components are in. Time to see if it works.
Putting it back together and testing it out
To reattach the panels, first, slide the metal housing back over the frame. Then, pop the front and back panels on by lining them up with the top of the case and firmly pressing them into place.
We can then plug in a power cable, a monitor and peripherals - and pray that we did everything correctly.
If it's all gone smoothly, you'll see a satisfying illumination from all of your RGB clad components and it's time to enjoy the fruits of your labour.
Installing Windows

If you've made it this far, we dare say that you're comfortable installing Windows, but for the sake of completion here's what you'll need.
- A purchased licence key for Windows 10 or Windows 11
- A USB thumb drive with at least 8GB of free space
- Access to the Windows Installation Media tool
Windows 10 Home 32 bit/64 bit English International | PC | USB Flash Drive
On another PC or laptop, visit this website to download the installation media of your choice. We're sticking with Windows 10 for now, but you can go with Windows 11 if you want to be on the cutting edge.
Once downloaded, open the media creation tool and follow the onscreen instructions to write to your USB flash drive.
After it's complete, insert the USB drive into your new mini-ITX rig and power it up. All being well, you'll boot straight into the Windows installation process. Just follow along with the installation wizard and configure Windows to your liking.
Finally, you can install your games and play to your heart's content.
Special thanks to NZXT, Gigabyte, ZOTAC, Samsung and ADATA for the support provided in creating this article.