Quick Links
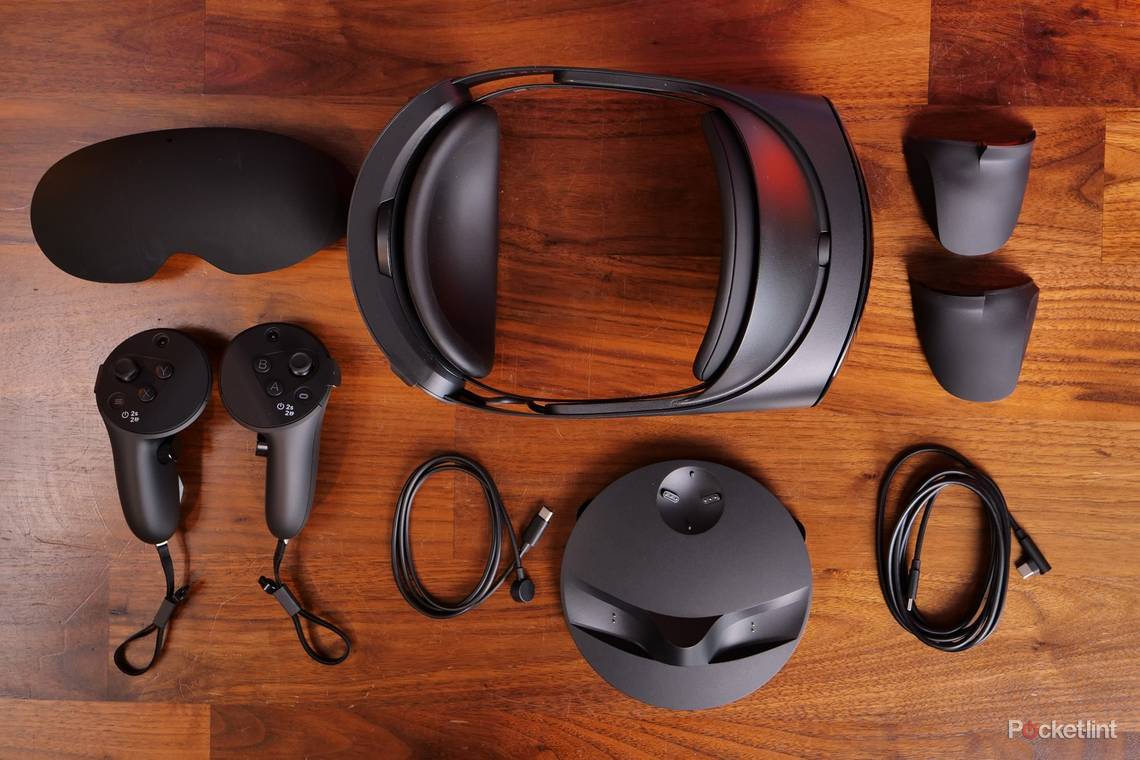
The Meta Quest Pro is packed full of features but some of them aren't immediately obvious.
After the initial setup where you've created a Meta account, logged into it via the smartphone app and connected to your headset, there are various things that you can do via that app and your headset to make the experience even more enjoyable.
So follow this guide to see what else is possible and what settings you can tweak to maximise your fun.
Turn on passthrough shortcuts
Like other most VR headsets, the Meta Quest Pro has various cameras for tracking your movements in virtual reality.
These cameras are also available for passthrough. This is a mode where you can use the cameras to see the real world around you without having to take your headset off.
As standard, you can choose to turn this mode on and off via the Oculus menu but you can also make your life a lot easier by simply changing a setting buried in the controls menu. This setting enables a shortcut for quickly turning passthrough on without faffing around with menus.
To do this:
- Tap the menu button on your right-hand controller and click the settings options
- Find the option for "Guardian" settings and click that
- Look through those settings and turn on the option to "double-tap for passthrough"
Once this is activated you can then simply lightly double-tap on the side of the Quest Pro to turn the passthrough view on and off. This is far easier than taking the headset off and the passthrough cameras are good enough to see the world around you. Perfect for re-orientating yourself if you've got lost in VR or if you just want to move somewhere else or avoid accidentally bashing into things.
Save battery life or enhance your experience
The Meta Quest Pro has some interesting capabilities but limited battery life. So there's a choice whether you make the most of the experience or improve your battery longevity for longer gaming sessions.
As well as standard VR tracking, the Quest Pro also has the ability to track your hands, your eyes and even your facial features. This has various different uses:
- Hand tracking: This setting allows the Quest Pro to track your hand and finger movements. There are some games and apps that can make the most of this, but you can also simply use this tracking to navigate through Quest Pro menus and settings with ease.
- Facial tracking: This is designed to track your "Natural Facial Expressions" so that they can be translated into VR. This means your avatar will replicate your own expressions including blinking, smiling and moving its lips when you talk. This is intended to help make social experiences more natural and personal.
- Eye tracking: This is similarly used to translate your gaze into virtual reality but it can also be used in some instances to improve your experience. This tracking works with foveated rendering to render what you're looking at in the best possible quality while putting less importance on things outside of your view. You need certain games in order to make the most of this. Red Matter 2, for example, is designed to enhance your experience this way.
All these things sound great, don't they? Well, these options certainly improve your potential experience when turned on but you might have some privacy concerns or just want to get some extra juice out of your headset. In which case you can pick and choose what to turn on and off.
We've written a detailed guide on how to turn hand and eye tracking on and off but if you quickly want to see these options and adjust them follow these steps:
- Press the settings button on your right hand controller to access the pop-up menu
- Click on the settings cog at the bottom of the screen
- Find and click on movement tracking
- Choose which settings you want to turn on and off

Cast your view to your TV
If you have a Google Chromecast device or a casting-capable TV then it's possible to cast your virtual reality view to it. This is perfect if you're trying to share your Meta Quest Pro experiences with your friends or family.
Virtual reality is usually a lone experience, so it's hard to get across how much fun you're having and this is the best solution for doing so.
This is really easy as long as your headset and your TV are connected to the same Wi-Fi network.
To cast your Meta Quest Pro to your TV:
- Turn both your headset and TV on and strap into the Quest Pro
- When you're ready press the menu button on the right-hand controller
- Then click the sharing button on the pop-up menu
- Click on the casting option that appears after that
- Find the TV you want to cast to and select it
- You might need to accept the casting connection on the TV before you first cast
- Return to VR and let everyone soak up the view
You might find there's a delay when you're casting, but the experience should mostly be a smooth one. If you want to it's also possible to record your game footage so you can share it later on.

Connect to your PC for even more versatility
The Quest Pro is more than just a standalone VR headset it's also highly capable in other ways. You can really open up the possibilities when you connect it to a Windows machine, especially a gaming PC.
This allows you to do certain things including:
- Turning on a desktop view so you can be productive in VR
- Access other content like PCVR games (outside the Quest store)
- Use your headset with a keyboard and mouse
We've written a detailed guide on how to connect your Quest Pro to your PC but you can do this either with a wire or without it. The first step is to download and install the Oculus App on your PC. This is different from the Quest App you have on your phone and allows you to set up various controls with relative ease.
The easiest way to connect to your PC is to:
- Download and install the Oculus App on your computer
- Connect your Quest Pro to your PC using your USB-C cable
- Turn Quest Pro on to establish the connection
- Select the option to use the link cable
- Put your headset on and click the prompts to allow the connection
- Press the menu button on your right controller to access settings
- On the navigation that pops up click the clock/power symbol on the bottom left
- Then you'll see various different options including Quest Link
- You'll need to click that to launch the Quest Link mode
You will then see a different view where you can view your different PC desktops, adjust the window size, open apps and more. All from your PC but viewed on your headset instead of your monitor.

Watch films and shows in VR
As well as using the Quest Pro for playing games and being productive, you can also use it to watch content. Essentially you can turn your VR headset into your own personal movie theatre.
This is great because it gives you a bigger screen to watch films and TV on but also allows for some private and personal viewing where you can really just soak in your favourite shows.
There are apps for things like Netflix, Amazon Prime Video and YouTube, but it's also possible to watch even more like Disney+, Hulu and more with a few simple workarounds.