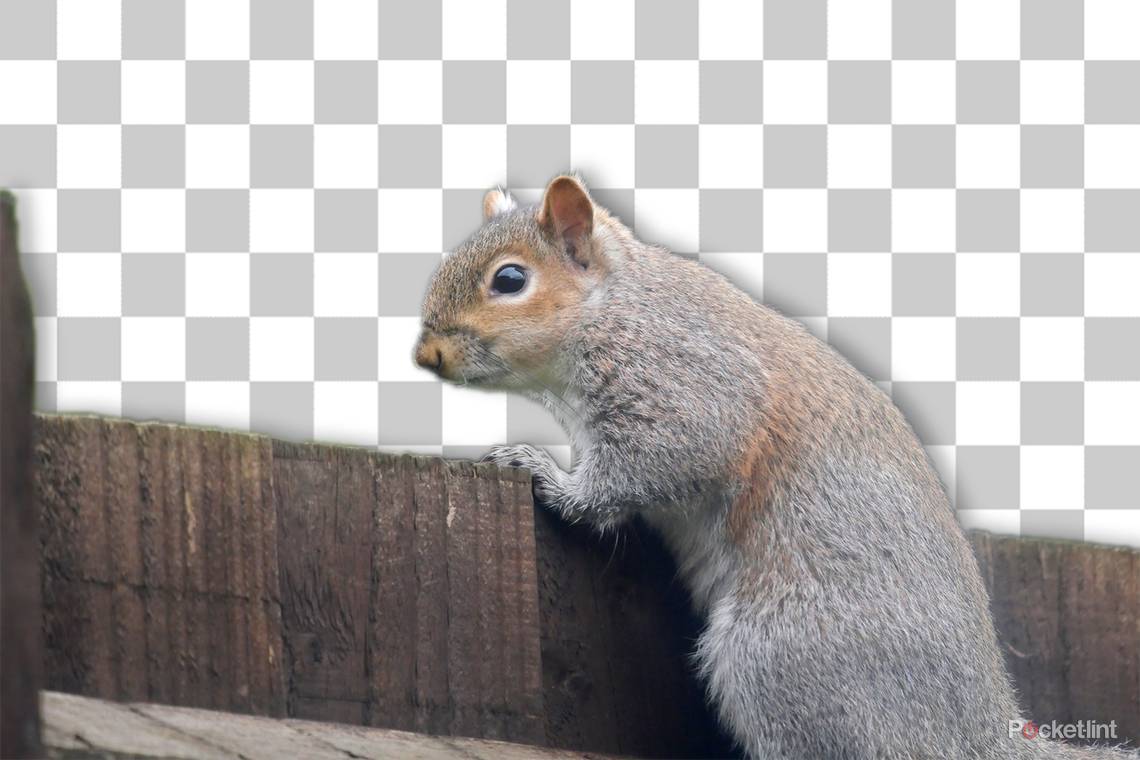
Whether you're just making memes or working on honing your skills as a professional graphic designer, learning to remove backgrounds is a fundamental Photoshop skill.
This skill unlocks the ability to make transparent PNG images, transport your subject to new locales or simplify product shots with a nice clean background.
As with everything in Photoshop, there are countless ways to approach this task. Thankfully, in newer versions of the program, it's easier than ever before.
Here are two of our favourite ways to remove the background from an image.

Removing a background with Quick Action tools
This first method is by far the fastest and most convenient, but it also lacks configuration options, so if you have a complex subject it might not be ideal. Still, it does a pretty excellent job on a lot of images, so it's always worth a try.

- Open Adobe Photoshop on your computer and import the image that you wish to edit
- Create a new layer by clicking Layer>New>Layer in the menu bar or by clicking the new layer icon in the Layers window
- Deselect your new layer, and reselect the Background layer
- Go to the Quick Actions menu at the right-hand side of your screen
- If the Quick Actions menu is hidden, you may need to click the two little arrows (Expand Panels) for it to show
- Click Remove Background and watch Photoshop work its magic
Removing a background with the Quick Selection tool
If you need a bit more control over what is and isn't selected, you'll want to check out the Quick Selection tool. This can be accessed in tools panel on the left-hand side of your screen, it's grouped with the Magic Wand, and long-clicking on that will allow you to switch to Quick Selection.
Here's how it works:

- Open Adobe Photoshop on your computer and import the image that you wish to edit
- Choose the Quick Selection tool from the tools panel
- To get started, we like to click Select Subject at the top of the screen
- If that's not working correctly, or you want to do it manually, click and drag the cursor across your subject until everything is selected
- You can use the Subtract from selection button (at the top next to brush size) to remove parts you don't want
- Zoom in to get the most accurate cutout
- Right-click within your selected area and choose Layer via Copy
- In the layers panel, you can click the eyeball next to "Layer 0" to make it invisible, or delete it altogether
Other handy tips
When you apply a new background to your freshly cut-out subject, you might find that it doesn't blend quite as well as you'd hoped. Here are a few things that can help your composited image look a bit more natural.

If the edges look a bit harsh and jagged, you can try adding a small feather to your selection. This adds a small opacity gradient to the edges of your subject, creating a more natural roll-off. With your subject selected, go to Select>Modify>Feather in the menu bar.
Another thing that can help is applying a layer style, such as a drop shadow, to your subject layer. With the subject layer selected, go to Layer>Layer Style>Drop Shadow in the menu bar.
Finally, you might need to tweak the colours of your image to get them to match more closely. There are a variety of ways to do this, but we tend to go to Image>Adjustments>Colour Balance and fiddle with the settings in there.
With these tools in your arsenal, you're well on your way to image editing mastery. As with many things in life, it's just about getting stuck in and seeing what works for you.