Quick Links
Like the Meta Quest 2, the Quest Pro is a very flexible VR headset that can be used in many different ways.
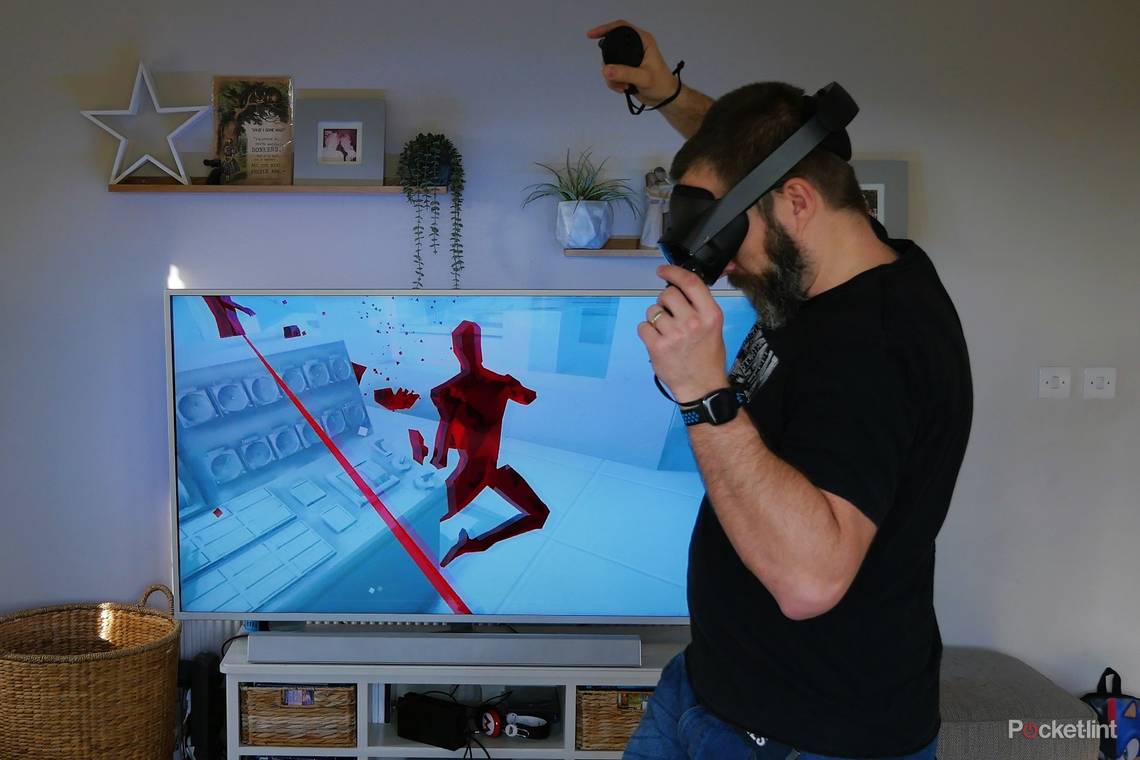
It's a great standalone headset, but while using the Quest Pro you might want others to see what's happening so they can enjoy the action.
One way to do this is to make use of the casting options. Here's how to do just that.

How to setup casting on the Quest Pro
If you have your Quest Pro connected to your smartphone, then it's fairly easy to cast directly to your phone from the headset. As long as you have the app installed on your Android phone or Apple iPhone then you'll see that option in the app.
It's more powerful to be able to cast to your television though, as it means a much bigger picture of what's happening and even includes sound so people watching can both see and hear what you're experiencing inside the headset.

You will need a Google Chromecast device or a casting-capable TV in order for this to work though.
- Ensure both your television and your Meta Quest Pro are connected to the same Wi-Fi network.
- Turn your TV on
- Put the headset on and turn it on
- Once it's loaded press the menu button on the right-hand controller.
- On the pop-up menu click the white arrow in the pink box (sharing icon)
- Click on casting option that appears on the next screen.
- Look for the right television in the list of available devices.
- You may then need to accept the connection on your TV.
- Activate pass-through or take the headset off to check the message on your TV.
- Once it's set up, return to the VR world and enjoy.

How to record footage on your Meta Quest Pro
At a basic level, it's easy to record of what you're doing and seeing in VR. Though it won't necessarily be the same view as what you see when you're casting. At least not as standard (there are workarounds for it). Default footage recorded in the headset is captured at 1024 x 1024 pixels, so it has a square format to it. The good news is it's easy to record though.
To do so, open up the app, game or experience you want to record and then follow these steps:
- Press the menu button on the right-hand controller.
- On the pop-up menu click the share button (the white arrow).
- On the next screen click record. You should then see a flashing red light.
- Now recording has started, press the menu button again to return to whatever you were doing.
- Once you've finished with what you wanted to record, press the menu button again.
- Click the share button again and click record again. This should stop the recording.
- Alternatively, you should see the option to stop the recording on the screen that displays the app.

How to access the recordings
Now you just need to access the recordings you've captured. In order to do this connect the Quest Pro to your PC. You can do this with the USB-C cable that comes with the headset and connects to the charging dock. Unplug both ends and plug one end into your PC and the other end into the headset itself.
Alternatively, you can use any other USB-C you have to make this connection. Then follow these steps:
- Make sure the headset is turned on.
- Put the headset on.
- You should then see a request for permission access to grant your PC access to the Quest Pro's storage.
- Use a controller or hand-tracking controls to click to allow access.
- Take the headset back off and return to your PC.
- Open Windows Explorer and navigated to the Quest Pro. It should appear as a drive on your machine.
- Click Internal shared storage.
- Click on Oculus.
- Click on VideoShots.
- You can then access the recording files you captured.
You can then copy the recordings from the Quest Pro to your main PC or to another external drive so you can access them with ease.
Recording at a higher resolution
The standard recordings captured by the Meta Quest Pro aren't at the best possible resolution, but there are ways to improve the quality.
One of these involves connecting the headset to your gaming PC using the Meta Quest Developer hub.
This is a bit tricky, so we'd recommend follow this guide to do this:
As you'll see, when you download the hub and connect the headset to your PC with the USB-C cable, you can then turn on higher quality recording - including 16:9 footage. Which is ideal if you're looking to record gameplay footage for YouTube.