How do you follow-up a great phone? With an even greater phone. That's what the Samsung Galaxy Note 9 is, Samsung's most accomplished device.
But there's no avoiding that can be a complicated phone to master. It has more features, more options and more to do than any other device out there.
Fortunately, we've all the hard work for you: these are the best Note 9 tips and tricks to help you master your S Pen marvel.
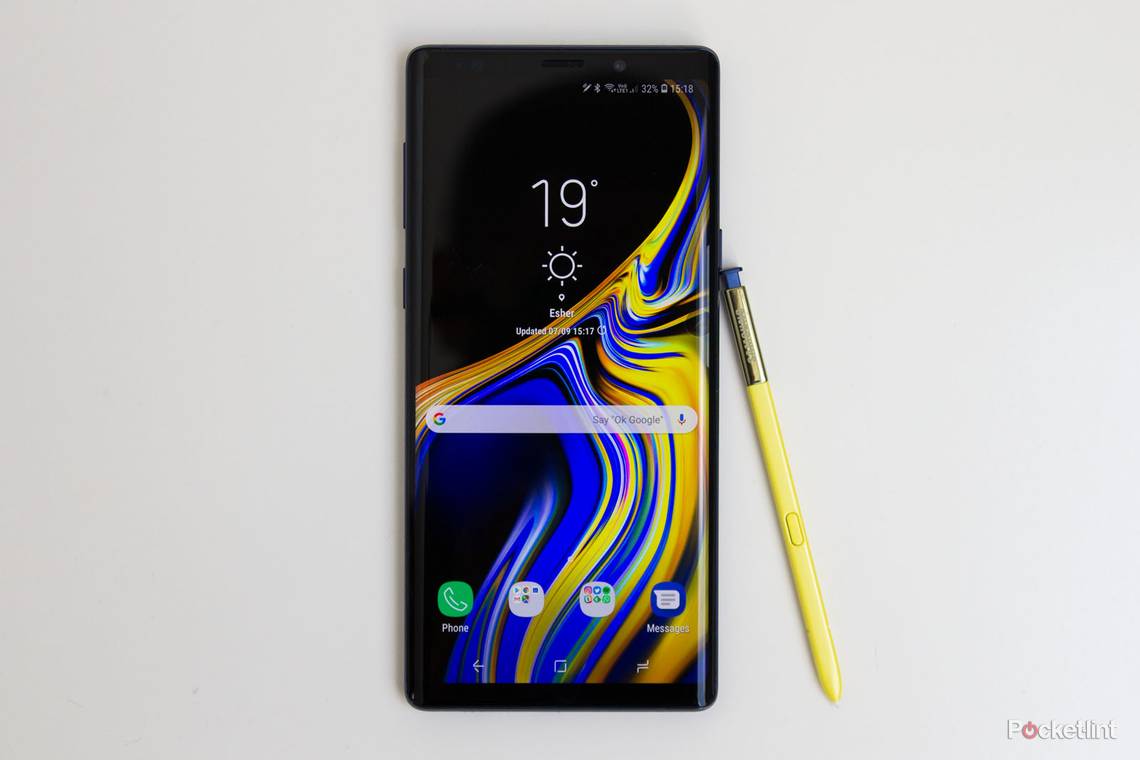
Samsung Galaxy Note 9
Samsung Galaxy Note 9 S Pen tips and tricks
The thing that makes the Note different to Galaxy S is the S Pen. For the Note 9, it also brings a range of new functions, adding Bluetooth to the S Pen and charging it when in the Note, for a seamless experience. Here's how to wield the S Pen like a pro.
Launch the camera or another app with S Pen: New to the Note 9 are a range of remote control features and the camera is the target. Head into settings > advanced features > S Pen > S Pen remote. This will let you select an app to launch on a long press of the S Pen button. It's the camera by default, but you can select other apps.
Control the camera with your S Pen: Take super selfies without touching the screen, using the S Pen. A button press will take a photo, a double press switches between front and back camera. The S Pen settings above gives you all the controls.
Flick through Power Point slides or Gallery photos with S Pen: You can also use that remote control to leaf through Point Point slides or Gallery photos, ideal if you're making a presentation on your phone, casting to a screen, or just sharing photos with friends. Just press the button to progress through photos. Again, the settings are in settings > advanced settings > S Pen > S Pen remote to manage these options.
Unlock your phone using S Pen: We don't mean using it to tap in your password, but by pressing the button on your S Pen. Head into settings > advanced features > S Pen > Unlock with S Pen remote. This only works when the S Pen is out of the phone and connected, designed to wake the display if it goes to sleep in the middle of something. It will also depend on your security settings as to whether it will return to what you were doing or take you to the lock screen.

Write notes on your lock screen: Just pop out the S Pen and start writing, without unlocking your phone. Just press the button on the S Pen to delete your scribbles when you make a mistake. Tap save to keep that note. Called "Screen off memo", head into settings > advanced features > S Pen and turn on this excellent feature. It will give you up to 100 pages of notes that can be saved. You can also choose to have it write in the same colour as your S Pen (if you have the Ocean Blue or Lavender Purple).
Choose what happens when you remove S Pen: Head into settings > advanced features > S Pen > when S Pen is removed. Here you have three action options for when the S Pen is removed - Air command, create note, or do nothing at all.
Customise Air command: Air command is the interface that pops-up for you to tap with the S Pen. To customise this, open Air command and tap the settings cog in that appears in the opposite corner. Here you can change the shortcuts, including to launch any app you have on your phone, or add in the useful Glance feature that's not included as standard.
Launch Air command if the icon has vanished: If you have the S Pen in hand, but the Air command icon has vanished or you've turned it off, just press the button on the S Pen as you approach the display and Air command will appear.
Highlight text with S Pen: Simply press and hold on the text you want to highlight. Or, press the button and tap the screen to select a word, or drag the selectors out to extent that selection.
Zoom in on a photo: In the Gallery, open a photo you want to look at. Double tap to zoom or touch with S Pen and press and hold the button to zoom by moving the S Pen. It's basically pinch zooming.
Have an alarm if you move too far from S Pen: To make sure you don't lose your S Pen, or leave it lying in a coffee shop, there's an option to get an alert if you move off and forget it. Head into settings > advanced features > S Pen > alarm.
Don't the the S Pen removal vibration or sound? Head into settings > advanced features > S Pen and you can turn off those sounds when removing or replacing S Pen.
Translate on the fly with S Pen: There's a translate option for S Pen. Simply remove the S Pen and from Air Command select "translate". Then go to your mysterious language text and hover over what you want translating. Using the control at the top you can select either a single word, or entire paragraphs.
Use live message to send custom gifs: You can write or draw replies to messages with S Pen and send the result as a gif. Simply pull out the S Pen when you've read a message and tap "live message" in Air Command. If the apps supports gifs, one will be created and sent as a reply. It works great in apps like WhatsApp.
Samsung Galaxy Note 9 home screen
One of the great things about Android is the home screen. Rather than omnigrid that has characterised Cupertino's phones for the last 10 years, Android has always been about screens, widgets, customisation and doing what you want. It's the starting point for your Note 9. Here's how to get the best out of it.
Edit your home screen: A long press on the wallpaper on any screen lets you edit the wallpaper, widgets, themes as well as manage your home page screens. You can also access the home screen settings here.
Change the wallpaper to your own picture: Long press as above and tap "wallpapers". At the top of the next page you'll see "my wallpapers". Tap the first image with the Gallery icon in the corner. This will take you through to the Gallery to select the image you want to use. Alternatively, from the Gallery, open the image you want and tap the menu top right and select "set as wallpaper".
Enable a motion or parallax effect on your wallpaper: If you want an added pop to your wallpaper, toggle on wallpaper motion effect. Long press as above and select your wallpaper, then turn on "wallpaper motion effect" before you tap the "set as wallpaper" button.
Apply a theme: Samsung has a load of themes. Just long press on the wallpaper as above, and you'll get the option to change the theme. Many are paid for, but there are free themes too. Hit the one you're interested in and change the look of your phone.
Change your icons: Along with themes there are also icon packs. Again, many need paying for and will adapt the style of your icons. Just head into the wallpaper and theme manager as above and you'll find the option to change your icons.

Remove the icon backgrounds: One of the things that Samsung likes to do is apply a background and create a "squircle" out of all app icons. It's own icons are designed to look like this, but when you install third-party apps, you don't want them looking rubbish too. Head into settings > display > icon frames. Select "icons only" and your apps look like apps again. This gives a more "Androidy look".
Get more on your home screen: You can change the size of the screen grid on which your shortcuts and widgets sit. Head into the home screen settings and select "home screen grid". To fit more on, select 5x6. This makes widgets more compact or lets you have up to 30 shortcuts.
Resize widgets: Many widgets are resizable. A long press selects them. When you lift your finger, you can drag the blue box that appears and resize your widget.
Create a folder: Simply drag one app on top of another and a folder is created. To remove an app from a folder, open the folder and long press an app to select it and drag it to delete at the top of the page. Or, press and hold an icon and a menu will pop up. You can select multiple items to create a folder. Conversely, you can long press on an app within a folder to get the option to remove it.
Change a folder colour or name: Open a folder and enter the name you want at the top. If you don't want a name, leave it blank. To change the folder background colour, tap the palette in the right-hand corner and select a new colour.
Access Bixby Home: Swipe right on your home page to access Bixby Home. This sits in the location that was previously Upday or Flipboard on earlier devices. When you first open it, you'll be encouraged to authorise a range of apps to populate it with content.
Disable Bixby Home: If you don't want it as part of your home screen, you can remove Bixby Home. Long press on your wallpaper, swipe right to Bixby Home and toggle off the switch. It will then vanish.
Access Google Assistant: Despite Samsung pushing Bixby as its own assistant, it also supports Google Assistant. Long press on the home button and you'll access Google Assistant, so you can speak to Google.
Change what a long press on the home button does: You don't have to have Google Assistant launch when you long press the home button. Head into settings > apps and open the menu top right. Tap "default apps" and you'll find something called "device assistant app" here. This will let you change the app that opens when you long press the home button and what that app can do. This could be Alexa, Google Assistant or Samsung Internet.
Access your Google home page: If you've used a Nexus or Pixel, you'll know that Google has its own home page. It compiles information that's useful, like traffic, news you'll be interested in, as well as local photo locations. It is the old Google Now page, filled with useful cards and it's now called "your feed". To access this page, tap the G icon in the Google search bar on your home page, at the bottom of the recent searches, you'll spot it - tap on "check out your feed".
Stop adding new app icons to home screen: If you don't want new apps you install cluttering up your home screen, head back to the home screen settings - toggle off "add apps to home screen".
Change launcher (home screen): You can easily change the experience of your phone with a different launcher, such as the Google Now Launcher. Just download the launcher from Play Store and install it. When you press the home button you'll be given a choice to select a new default launcher. To change the default launcher, head into settings > applications and tap the top-right menu. Tap default applications > home screen. Here you'll find a full list of launchers to select or delete.
Change the navigation bar buttons: To change the button order you get at the bottom of the display head into settings > display > navigation bar > button layout. Here you switch the back or recent apps icons to be the same as the rest of Android. You can also change the background colour in this area, as well as toggle a button to lock the navigation bar in place, or let it hide when not needed.

Samsung Galaxy Note 9 apps tray
The apps tray is where all your app icons are stored. By default it's a mess, randomly arranged, with new apps being plonked on the last page. It's accessed with a swipe up on the home screen by default, but then scrolls left and right. Here's how to manage your apps tray like a pro.
Close the apps try with a swipe: You don't have to press the home button to go home, you can swipe the apps tray away either with another upwards swipe, or a downwards swipe.
Remove the apps tray: If you want your apps all on home screen pages, you can remove the apps tray completely. Long press on the home screen" and select "home screen settings". In the "home screen layout" you'll have the option to have "home and app screens" or home screen only".
Change the apps tray grid: This will let you fit more icons or folders on one page and take advantage of that massive screen. Head into the home screen settings and select "apps screen grid". Change to 5x6 to fit the most on.
Put an apps button on the home screen: For years Samsung had an apps button you could tap to open the apps tray. It is off by default, but you can restore it if you prefer that over swiping. Head into the home screen settings and you'll see the option for "apps button" to turn it back on.
Search for apps: There's a handy search bar - Finder - at the top of the apps tray so you can search for your apps. Or you can open a Google search and type the app. This will reveal device apps to open at a tap.
Manually reorder apps: To manually move apps around you have to have open the apps try and hit the menu button top right and press sort > custom order. Then long press on an app icon and then drag it to the location you want it to be, but be careful not to drop it on another app, as you'll make a folder, as below. If you hold it too long, you'll dump it on the home screen, so it's a little tricky.
Alphabetise your apps: We prefer to sort in alphabetical order for simplicity. Open the apps tray, open the menu top right and select "sort", then "alphabetical order". This then switches everything into it's place.
Create an apps tray folder: Long press on an app icon, but this time drag it over another icon and you'll create a folder with those two items. Or, long press and tap "select multiple items". This will let you select a number of apps (including on different pages) and once you have those you want, tap the "create folder" option at the top of the page.
Uninstall apps: Long press on the app icon and tap "uninstall", it's as simple as that.
Remove a folder from the apps tray: If you don't like folders you've created, or want to break the apps out of the default folders Samsung offers, long press on the folder and select "delete folder" from the pop-up menu. The folder will be removed and the apps set free into the apps tray.
Add apps to your home screen: Press and hold on the app shortcut in the apps tray. This will let you place a shortcut on your home screen. If you're making home screen folders, you can drop it right into the folder you want.
Samsung Galaxy Note 9 app management
Moving from the apps tray to the apps themselves, there are other management features that are worth exploring to get the most out of your Note 9.
Enable full screen apps: The 18.5:9 display means that many apps won't natively open in full screen mode, instead running in a more regular 16:9 aspect. If you open one of these apps, a banner at the bottom will offers to "view full screen" and force the app into 18.5:9. If you don't see this messages, by head into settings > display > full screen apps. Here you can go through your list of installed apps and turn on full screen for those that aren't enabled.
Turn off full screen apps: As above, in that same area you can toggle off apps that are showing full screen but you don't want to, perhaps if it causes a problem in a game for example.
Change the default app: Android lets you decide which is the default app if you have more than one that will do the same thing. Under settings > apps > menu > default apps you can see what has been selected as the default browser, calling app, messaging app and home screen/launcher. You can also elect to have the Note 9 automatically select default apps, or ask you when there's a choice under the "default app selection" setting.
Control app permissions: Android lets you manage all the permissions for each app on an individual basis. Go to apps > select the app and hit "permissions". This will let you toggle permissions on and off, so you can disable location access, for example, or check what that dodgy APK is accessing.
Power manage your apps with special access: Apps can do a lot and there can be a lot to control them, but a handy option is the "special access" menu. Head into settings > apps > menu > special access. Here you'll find all sorts of permissions and controls and which apps can do particular things - for example you can see all the apps that will appear over the top of another, apps that can do picture-in-picture, apps that will be able to install apps on your phone. It's an easy way to control settings for a feature across a range of apps.

Samsung Galaxy Note 9 quick settings
Quick settings is a universal feature of Android putting your essential and often used settings at your fingertips. Samsung adds a range of tweaks and changes to supercharge the quick settings area. There are two views, a single swipe instant access and the full quick settings pane. Here's how to get the most out of the Samsung Galaxy Note 9 quick settings.
Quick open the top panel: The quick settings panel and notifications come down from the top of the device, but you don't have to swipe from the top, you can swipe anywhere on the screen. Head into home screen settings > quick-open notification panel to turn it on. Then you don't have to reach all the way to the top of the phone to access it.
Add brightness adjustment to the instant access view: When you swipe down you'll see five key settings appear in the instant access view. Brightness is something you can add to this view, meaning you can change the display brightness really quickly and without opening up the full quick settings area. First, open the full quick settings view (as below) and tap the down arrow to open the options. You'll see a toggle here for "show control on top". This moves the brightness slider up the quick settings area so it's easier to get to quickly.
Access full settings for the quick setting: Confused? Don't be. You can jump to the full settings for any of the quick settings icons with a long press. For example, if you want to jump to the Wi-Fi controls, press and hold the Wi-Fi icon in quick settings and you'll jump to the full menu page for Wi-Fi.
Quickly change modes/selection from quick settings: Yes, quick settings will let you toggle things on and off, like Bluetooth, but tapping the words under the icon will open another panel in quick settings giving you more options. This will select a device (like Wi-Fi or Bluetooth) without heading to the full settings menu, and it's really good for accessing power saving modes.
Edit quick settings icons: To change the selection of shortcuts in quick settings open the quick settings area and tap the menu top right. This gives you the option of "button order", where you can add or remove the icons by dragging them in and out of the list. You can also reorder the apps. Remember that the first five icons are those you see on the instant access view, so pick your most important settings and put those at the top.
Change the quick settings grid: This lets you change the number of shortcuts shown in the quick settings area, meaning you can get more on one page. open quick settings and tap the menu top right and select "button grid". This lets you choose 3x3, 4x3 or 5x3. The latter crams the most in.
Access full device settings from quick settings: There's a settings cog in the top right-hand corner when quick settings is open. This takes you to the full settings menu, but it sits pretty close to the settings menu for the quick settings area, so make sure you tap the right one.
Enable/disable SmartThings panel: Samsung is leveraging SmartThings as a point of connection to manage smart home devices and other things, like Bluetooth headphones. You can enable a SmartThings panel in the notifications area for quick access to device control. First find and open the SmartThings app, then open the menu top right, hit settings > SmartThings panel to turn it on. You can then access all your connected devices quickly.

Samsung Galaxy Note 9 lock screen and security
Samsung offers a whole range of security options, including iris, fingerprint and face recognition, meaning more options for unlocking your phone. The Note 9 also moved its fingerprint scanner to make it easier to locate: it's happy days for biometrics.
Change lock screen shortcuts: You can have two shortcuts on the lock screen for quick access. These are phone and camera by default, but can be anything you like. Head into settings > lock screen > app shortcuts. Here you can select the left and right shortcuts, or turn them off completely.
Select your security type: You can choose what you can use to unlock your phone by heading into settings > lock screen > screen lock type. Here you can toggle on or off the different biometric options, as well as select if you want a PIN, password or pattern (you'll need one of these before you can use biometrics).
Fingerprint security: To use your fingerprint to unlock, head into settings > biometrics and security > fingerprint scanner. Here you can add your fingerprints and toggle on or off the fingerprint unlock option. We recommend registering at least the forefinger on both hands, so you can unlock with either hand. You'll have to set a back-up PIN or passcode at the same time.
Iris security: To use your eyes to unlock the Note 9, head into the the biometrics and security settings as above but select iris scanner. Alongside fingerprint, you'll get the option to scan your iris as another unlock option.
Face recognition: To use your face to unlock your phone, head into the biometrics and security settings as above and select face recognition. This will learn your face and let you unlock by looking at your phone. This is less secure than iris scanning or fingerprint scanning as it can be opened with a picture of you.
Use intelligent scan, face and iris combined: As a added measure, Samsung fused iris and face scanning to create intelligent scan. This uses both measures, so it works in all conditions - and it's as simple as using one of the individual measures. Again, you'll find it in biometrics and security settings.
Instant lock: When you press the standby button, you want your phone to lock instantly. Head into settings > lock screen > secure lock settings. There's the option to lock the device as soon as the screen goes to sleep or when you press the standby button. If you do want a delay, there are plenty of time options.
Smart Lock/Bluetooth unlock: Settings > lock screen > smart lock is a standard Android feature where you can nominate trusted devices or conditions, so your Android will unlock when connected to something else, or in a particular location. You can nominate Bluetooth devices (like your smartwatch or car Bluetooth), location, trusted voice and so on.
Automatically wipe your device: If you're worried about your phone falling into the wrong hands and being cracked, you can have it automatically wipe. Head into settings > lock screen > secure lock settings. Here you'll find the option to auto factory reset if 15 failed unlock attempts are made.
Unlock with home button: The virtual home button under this display with usually wake up the screen with a hard press. But you can use it to bypass this and get straight to security, making for faster and easier unlocking. Head into settings > display > navigation bar and select "unlock with home button". If you don't have security, it will take you straight into your phone.
Remove the need to press ok once you've entered your PIN: Some phones will unlock when you have entered the right PIN, some ask you to tap OK to confirm. The Note 9 will do either. When you enter your PIN for the first time (or change it), there's a checkbox option to let you confirm the PIN without tapping ok. If you use PIN, this just makes things faster to unlock.
There are also a whole load of functions relating to notifications on the lock screen which we look at in the notifications section below. If you're looking for tips and tricks around the always-on display, those are in the display section below.
Samsung Galaxy Note 9 edge screen tips
Edge screen is the name that Samsung gives to the functions that can be applied to the edges of the display. Here's how to use edge screen like a pro.
Manage edge screen content: Head into settings > display > edge screen and tap on edge panels to select those you want turned on. Or, swipe in to open edge screen, then tap the cog bottom left. You can add or remove content, as well as download other content here. For best effect, don't have too many panels, otherwise you might as well just unlock the phone and go direct.
Change the apps in apps edge: One of the edge panels offers you app shortcuts. This means quick access to up to 10 apps. As above, head into edge panels and tap EDIT at the bottom of apps edge. You can then bin Samsung's suggestions and load it with your own apps, like PUBG Mobile or anything else you need to get to quickly.
Use App Pair to launch two apps simultaneously: App Pair will let you create double shortcuts to launch two apps in split screen mode. Head into the edit section as detailed above, but then tap "create app pair" top left. You can then select two apps you'll want launched together (as long as they support split screen mode).
Change the location and size of the edge screen handle: This is important. As the Note 9 is a big phone, it's really useful to be able to change the location of the edge screen launch tab. Head into edit edge panels as above and click the menu top right, tap edge panel handles. This lets you change the handle to left/right, the location along that edge, the size as well as the transparency. Make it 100 per cent transparent and it vanishes, so you don't have the little bar there looking ugly. You can also add vibration if you'd like it.
Reorder edge screen panels: If you want to swipe in and see your calendar before your apps shortcuts, head into settings > display > edge screen > edge panels and then tap the menu top right, and hit reorder. You can then arrange your panels.
Use edge screen from the lock screen: You don't have to do anything, it just works. Swipe in and you'll be presented with your edge panels from the lock screen if its awake. Before you can open an app or contact, you'll need to unlock your phone, which is where intelligent scan is really quick and easy.
Enable edge lighting for notifications: You can have the edges light up when you have a notification. Head into settings > display > edge screen > edge lighting. This will then flash the edges of the display when you have a notification.
Select the apps that will have edge lighting flashes: If you want particular apps to use edge lighting, head into the settings as above and tap on edge lighting > manage notifications. You can also change the colour and size of the flash so it's not too distracting.
Samsung Galaxy Note 9 notifications tips and tricks
Notifications are really powerful on Android but they can get overwhelming or complicated. There's a lot of parity between Android devices when it comes to notification management, but settings do move around. Here's who to tame your Note 9 notifications.
Disable/enable lock screen notifications: If you don't want notifications on your lock screen, head to settings > lock screen > notifications. You can turn all notifications off with one switch.
Only show notifications as app icons on lock screen: We love this option. As above, head into notifications and there's a toggle option for notification icons only.
Instant access to lock screen notifications: Just tap a notification twice and it will open up the app. Want to dismiss it? Just swipe it away. If you want to open it and you have security in place, you'll need to unlock your phone to view the content.
Control your app icon badges: App icon badges will let you know what apps you have notifications for and now many. It's on by default, but you can turn it off, or remove the numbers if you want a simple dot. Head into settings > notifications > app icon badges. The resultant menu reveals all.
Hide content in some app notifications: If you want to have notifications on your lock screen, but hide sensitive information in some of those apps (like a messaging app), first enable lock screen notifications to show content as above. Then head into settings > notifications > advanced. Here you can manage the notifications of each individual app. You can opt to hide or show content from the lock screen here for specific apps.
To turn off notifications on an app: Go to settings > notifications. Here you'll find a list of apps and you can turn off notifications on those you don't like. Don't want Facebook notifications? It's here you can turn it off.
To turn off pop-up notifications on an app: Go to settings > notifications. Tap on the app you want. Here you can select whether to allow interruptions or not, so you don't get a notification for that app appearing at the top of your screen when it arrives or a sound or vibration.
Set an app's notifications to override Do not disturb: Head into settings > notifications. Tap on the app you want. There's an option for "Do not disturb custom exception", which makes the app alway notify you - perfect for home security products, for example.
Still getting a notification you can't get rid of? A quick general Android trick - press and hold on any notification and you'll be taken through to the notifications for that app directly, so you can kill it.
Enable edge lighting for notifications: As we mentioned above, you can have the edges light up when you have a notification. Head into settings > display > edge screen > edge lighting. This will then flash the edges of the display when you have a notification.
Disable the LED flashing: Don't want the flashing LED? Head into settings > display > LED indicator and you can toggle it off so it won't flash when the screen is off.

Samsung Galaxy Note 9 audio, volume controls and Do not Disturb
While you need to know what's going on with your phone, sometimes it just needs to shut up and leave you alone. There's loads of options to manage how your device behaves at different times and it can be confusing. Here's how to manage everything perfectly.
Quickly switch to vibrate alerts: If you want silence, but are after vibration alerts still, push the volume button and tap the speaker icon on the pop-up. This will switch to vibrate. Or you can hold down the volume button so it slides all the way down to vibrate.
Set your phone to silent: The normal volume controls only go to vibrate which is a little irritating. To make your phone silent, swipe down to the quick settings and tap the sound shortcut. This will cycle through sound/vibrate/mute.
Turn down media volume: Hit the volume up or down button, and the volume slider will appear. Tap the down arrow on the right-hand side, and you can change the ringtone, media, notifications, system volumes and Bixby voice volumes independently. Perfect for when you want to watch a YouTube video on the bus without disturbing others. As a pro tip, toggle the option "use volume controls for media", then you can use the volume rocker to change volume when something is playing.
Turn on Dolby Atmos: It's an option on 2018 Samsung devices, widening the sound stage for a more immersive experience. It's a toggle option, either on or off. Head into your quick settings and you can tap to turn it on. Once it's on, you might as well leave it on.
Fine tune the sound output: If Atmos isn't your thing, you can tune the sounds yourself. Head into settings > sounds and vibrations > sound quality and effects. It's here you'll also find the "adapt sound" option which will let you tune your headphones to your ears for a personalised sound.
Turn on Do not Disturb: Do not Disturb is an Android feature that lets you silence your phone, but set up a range of exceptions. For example, it will let specific people call, or certain apps notify you (as we outlined above). You could use it to silence work apps, but still let you hear eBay alerts, for example, or silence all notifications, except calls from your mother. Swipe down quick settings and tap the Do not Disturb button to turn it on.
Customise Do not Disturb: The best thing about Do not Disturb is how flexible it is. Firstly, turn it on as above, then tap the notification that appears to customise it. Here you can set a schedule as well as set your exceptions, including whether you want alarms to sound, or your favourite contacts to still come through. You can also manage whether the LED flashes here.
Turn off touch sounds, screen lock sounds, vibrations feedback: A new Samsung phone is a noisy Samsung phone. It chirps and vibrates on every action, which will soon drive you up the wall. You can tame those sounds in settings > sounds and vibrations and scroll to the bottom of the list. Here you can turn off the system sounds as well as keyboard sounds - a significant relief.

Samsung Galaxy Note 9 display tips
The Galaxy Note 9 offers a 6.4-inch Quad HD+ display with support for Mobile HDR. It's stunning, but also loaded with features you need to know about.
Turn on Always On display: To have the lock screen show you "always on" information, head into settings > lock screen > Always On display > and switch it on. This displays when the phone screen is in standby.
Customise Always On display: There are lots of options for Always On display. Tap on Always on display in the menu as detailed above and you'll see different clock options. By default it will show according to a schedule, but you can toggle "show always" to have it always showing.
Add music controls or weather to Always On display: You can have music controls as part of your Always On display too. Samsung calls this a "FaceWidget" and you'll find it in settings > lock screen and security > information and FaceWidgets. Toggle on to show when the display is off.
Only show the home button on the lock screen: If you don't want Always On display, but do want to be shown the home button, this is an option. You'll have to turn on Always On display as above, but then in the "content to show" section, you can select "home button". This removes the clock and everything else, just leaving that square home button logo at the bottom.
Enable blue light filter/Night mode: Designed to reduce eye strain in low light, the blue light filter will make the display warmer (more yellow, cutting out blue light), so it's easier on your tired eyes. Head into display > blue light filter. Here you can change the intensity of the change, as well as set a schedule - including a simple sunset to sunrise option. Blue light filter is also available in quick settings.
Get more on the screen: Aside from changing the app grid, you can change the zoom of the screen. Head into display > screen zoom and font and you can pick larger or small. Pick small to get more content on the display.
Enable full screen apps: We've mentioned this before, but if your app isn't full screen, head into settings > display > full screen apps and choose those apps you want to force into the 18.5:9 aspect. For many it will be fine, but you might lose some information in the corners in some.
Change the display resolution: You might wonder why you might do this, but primarily, it's to save battery life. The Note 9 will give you 2960 x 1440 pixels, but you can slide it down to 2220 x 1080 to save battery, or 1480 x 720, although you'll see the difference in sharpness. The default is 2220 x 1080, FHD+.
Engage smart stay to aid reading: Smart stay will automatically detect your face when you're reading something and stop the display timing out. This might be useful for reading, if you're a slow reader, or if you're examining something in detail. Head into settings > advanced features > smart stay.
Take a screen shot: There are a number of methods for taking a screen shot. Press and hold standby and the home button at the same time to take a screen shot. Or you can use a palm swipe - head into settings > advanced features > palm swipe to capture. This will let you swipe the display with your hand to capture the screen. We've a full breakdown of options you can read here.
Supercharge your screen shots: If you want more than just what you can see, head into settings > advanced features > smart capture. This will let you do a range of cool things, the best of which is scroll capture to include things that can't be seen in one screen shot - a great way to capture a full document or webpage for example.

Samsung Galaxy Note 9 multi-tasking
Samsung has done more to push multi-tasking than anyone else in the mobile space, so it's no surprise to find that the Note 9 offers a number of alternative ways to interact.
Split screen view: To view two apps at the same time, hit the recent apps button and look for the multi view logo in the top left of the app card - it's like two boxes. Tap this and it will occupy the top of the screen. Then select the app you want on the bottom by scrolling through the list. You can adjust the size by dragging the blue dividing line up or down the screen. Or, head into settings > advanced features > multi window and toggle on "use recents button" then you can do the same by pressing and holding the recent apps button.
Close split screen and return to normal view: You can long press the recent apps button to return to a normal view. Or, hit the home button and now you'll see a shade at the top of the display with an X in it. Tap this and you close the split screen view.
Use App Pair to launch two apps simultaneously: As mentioned above, a great feature on the Note 9 is App Pair. This will let you create double shortcuts to launch two apps in split screen mode. The best way to make an app pair is to enter split screen view as above, then on the dividing line you'll get a run of controls. The first is a home icon - tap this and the App Pair shortcut is added to the home screen. Next time, you want to open it, you just tap that shortcut.
Pop-up view: To view your app as a pop-up - like a single separate window - drag the app in from the top left-hand corner. The app will shrink down and can then be moved around and placed where you want. To close it, tap the X at the top.
Turn your pop-up app into a floating icon: This is really useful for anything you want to refer to regularly. From pop-up view you can shrink an app back into a floating icon, by tapping the box in the top of the app. The floating icon will then sit over other apps and spring open when you tap it.
Snap window gives you a glanceable: There's another feature called Snap window that will capture part of an app's screen and pin it to the top of the display. This can be really useful for reference information while you're doing something else. It also works well with Google Maps. Tap the recent apps button and select the rectangular icon with a circle top and bottom. This pops up a frame on that app which you can move over the information you want to pin and tap done.
Samsung Galaxy Note 9 camera and photo tips
The camera on the Note 9 is fully charged. You can point and shoot and get a great shot, but there's lots you can do to power-up your camera experience.
Quick launch: Double tap on the standby button to launch the camera. You can do this from the lock screen or any other location in the phone. If it's not turned on, head to the settings > advanced features and toggle on "quick launch camera".
Quickly flip from rear camera to front: Swipe up or down the screen and you'll flip from rear camera to front which is much faster than tapping the small button to switch cameras. Or, if you want to be even faster, double press the standby button when the camera is open to switch from front to back.
Swipe across shooting modes: There's no shooting modes menu any more, instead you can select them across the top of the viewfinder, or you can swipe from one to the next.
Shoot in full view: With an 18.5:9 display, there's the option to take photos in this aspect too. They end up wide and basically crop the sensor to fill that aspect, giving you a 4032 x 1960 photo, so you don't get a "wider" picture.
Enable video stabilisation: The Note 9 offers stabilisation on all resolutions of video, including 18.5:9. Head into camera app > settings and you'll find the stabilisation option.
Use the scene optimiser for better results: A new addition to the Note 9 is scene optimiser. This is Samsung's "AI mode" which analyses the scene and attempt to recognise what you're taking pictures of and give you better colour results. You'll see the scene depicted by an icon on the screen, like food, portrait, landscape, beaches, night scenes, snow and so on. You'll find it in the camera app > camera settings > scene optimiser.
Use flaw detection to help your group shots: Open the camera app > camera settings and scroll down about halfway and you'll find "flaw detection". This scans your photo, alerting you if anyone has their eyes closed or is blurry. It will alert you with a pop-up in the camera app when you're shooting group photos for example, so you can retake it if something is wrong. It's a brand new feature for the Galaxy Note 9.
Wide selfie: To get more into your selfie shot, select the front camera, then swipe in from the left to select the mode. Tap wide selfie and you can take a wider shot by moving the camera when taking a selfie.
Grab an AR Emoji to share with friends: One of the headline features at the launch of the Galaxy S9, you'll find the AR Emoji as a shooting mode in the camera that you can swipe across to. This will work on the front and back cameras so you can make an AR Emoji yourself or of another person.
Add a floating shutter button: This is really useful for those situations where you're holding the camera one-handed and can't reach the button. In the camera app > camera settings near the bottom, you'll find the option to toggle it on. Then, in the camera, you'll have an additional button you can put anywhere you want on the screen.
Shoot a gif: Yes, you can great a gif directly from the camera. Head into camera settings and then the "hold camera button to" option. This would normally shoot a burst of photos, but you can change it to shoot a gif. It takes a series of photos as you're holding it and turns them into an animated gif for you.
Use voice to take pictures: Voice works on both the front and back camera. From the camera head into settings > voice control and turn the option on to use voice capture.
Zoom in on the rear camera: You can pinch zoom, but that's a pain if you only have one hand free. You can slide the shutter button to zoom, instead and it's pretty smooth too.
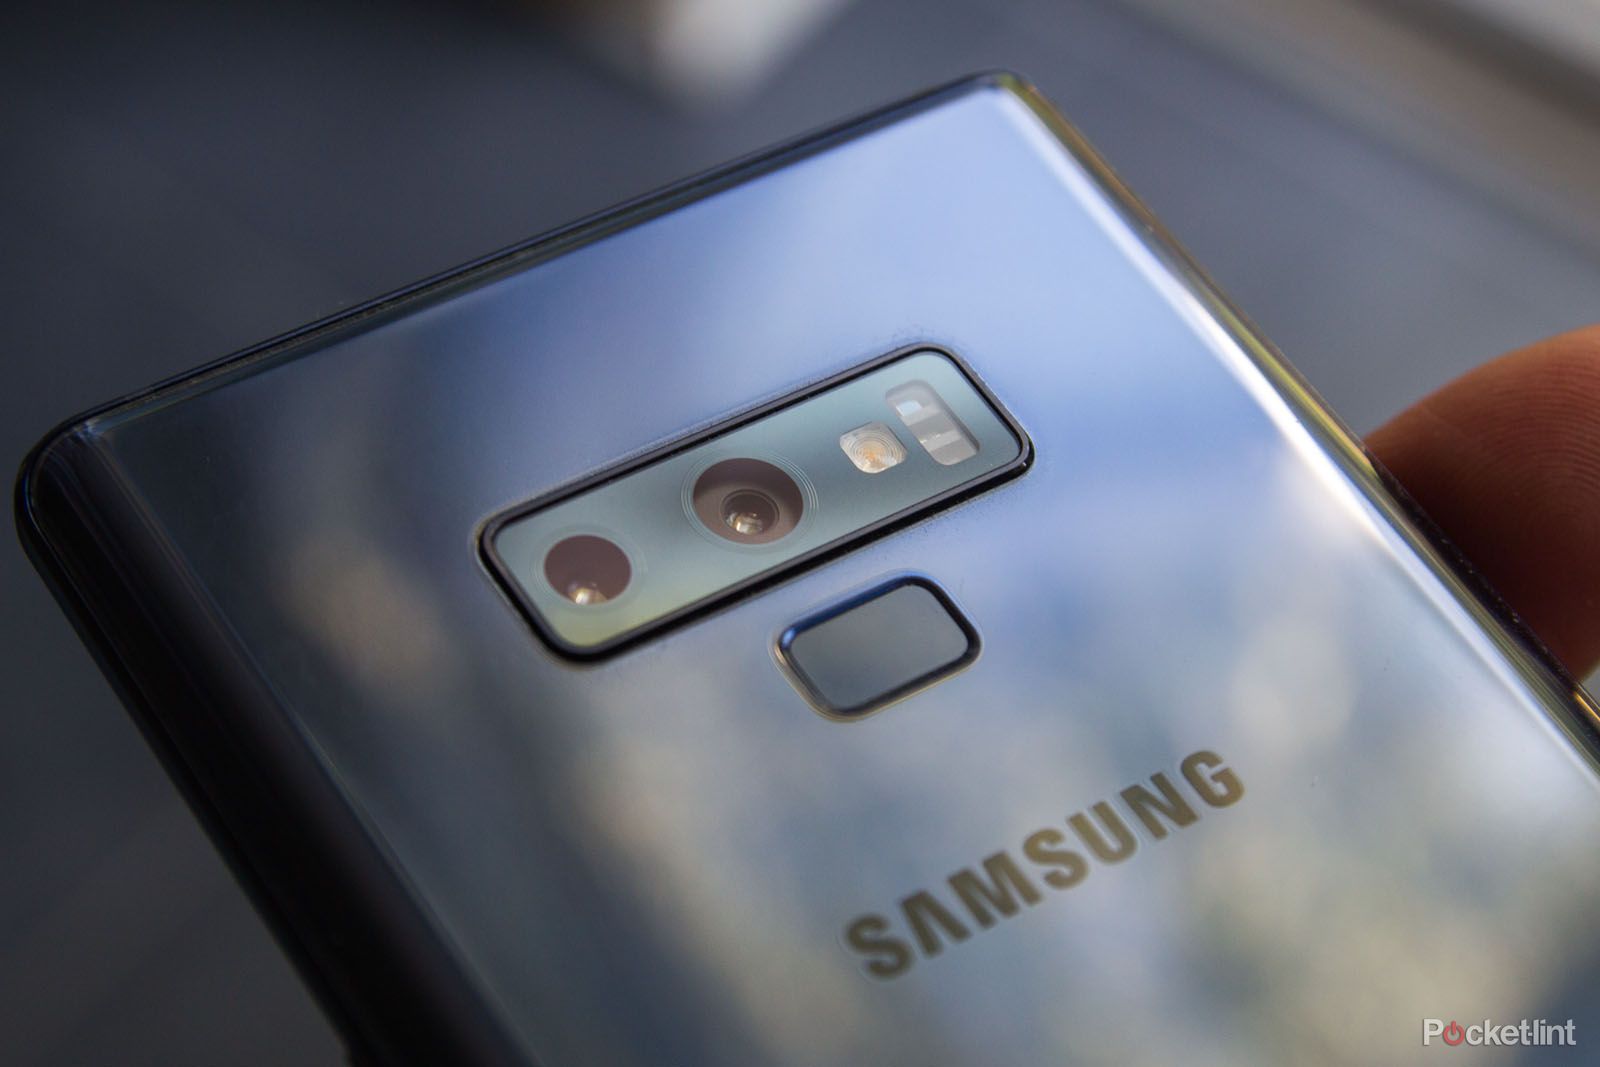
Switch to 2x optical zoom: Using the digital zoom downgrades the quality, but the Note 9 has dual cameras to give you lossless 2x optical zoom through the second lens. Once you've opened the camera, you'll see a small 2x button on the right of the display. Tap this to switch lenses. Tap it again to return to normal view.
Use live focus: This is a mode that uses data from both cameras to create a depth map, letting you create bokeh effects, or add or remove background blur at the time of shooting, or post shoot. In the camera, slide across to "live focus" and compose your photo. You can use the slider to adjust the intensity of the background blur, then take your photo. This works really well for portraits of people.
Edit live focus photos once taken: Head into the gallery and open a photo you took with live focus. You'll be presented with on-screen options for these photos, letting you view either the close-up or wide-angle photo. You can change the blur on the close-up pictures. (The wide-angle photo is the standard photo from the normal camera.)
Capture 2x zoom video: You can capture video through either camera on the back. Just hit the 2x button to switch cameras before you start recording and you'll have the benefit of that closer view. As there's also optical image stabilisation and video stabilisation, you'll get nice smooth video even if you're walking.
To take a long exposure photo: In the camera app, swipe to the Pro mode. On the right-hand side you'll see the option to change the length of the exposure (it looks like a camera shutter). Use the slider or the arrows to select the length of time you want - you might want to use the S Pen to make it easier. The exposure compensation meter just above it will indicate whether you're going to over or under expose. You can also change the ISO and other settings here, useful for night shooting.
Manually select the aperture of the rear camera: The Note 9 has a dual aperture main camera, f/1.5 and f/2.4. In normal shooting it automatically selects the setting based on the conditions, but you can manually override it. As above, head into the Pro mode and tap on the shutter option. At the bottom you'll see a button that has either f/1.5 or f/2.4 in it. Tap this to switch apertures.
Change gallery view: If you're looking at your photos and you want more or less on display, you can pinch zoom, to change the thumbnail view.

Samsung Galaxy Note 9 Bixby tips and tricks
Bixby is Samsung's universal assistant, designed to make it easier to use devices that are getting increasingly complex. The Note 9 introduced Bixby 2.0 as Samsung continues to push Bixby as an alternative to Google Assistant.
Access Bixby Home: As we said in the home screen section above, swipe right on your home page to access Bixby Home. This sits in the location that was previously Upday (in the UK) on the Note 7 or Flipboard on earlier devices.
Disable Bixby Home: If you don't want it as part of your home screen, you can remove Bixby Home. Long press on your wallpaper, swipe right to Bixby Home and toggle off the switch. It will then vanish.
Access Bixby Voice: To use Bixby Voice, you'll need to press and hold the Bixby button. You speak while holding the button down. Once you release the button, Bixby will interpret what you've said and try to find a response. If you press and release the button, you'll land on a Bixby page, but Bixby won't be listening - you can then type questions for Bixby instead.
Turn on or off Hi Bixby voice waking: You can enable or disable Bixby voice wake-up, allowing you to say "Hi Bixby" rather than pressing the button. Press the button to open Bixby, then open the menu in the top right-hand corner. Select settings > voice wake-up. Here you can turn on or off the feature, as well as change the level of sensitivity needed to trigger it.
Use Bixby when your phone is locked: Bixby can perform some tasks without unlocking your phone. The options are rather limited, like searching or calling - and then we never had any great success with those things either.
Use Bixby to compose a message and send it: Bixby is pretty good and carrying out multi-step tasks, like sending messages. Simply press the button and say "send a message to [contact] saying when will you be home" and it will open messages, compose the message to the contact and then ask if you want to send it.
Use Bixby Vision to get notes on wine: Core functionality for a core market perhaps. Open Bixby Vision (either via Bixby Voice or by opening the camera and selecting Bixby Vision) and point the camera at a wine bottle label (not the whole bottle). Bixby will extract the information. Tap the "wine" tab and you'll get all the information about that vintage.
Samsung Galaxy Note 9 managing calling, data and networks
Smart network switching: If you want to let your phone switch to mobile data when a Wi-Fi network is poor, enter settings > connections > Wi-Fi > settings > advanced > switch to mobile data. You can also change how aggressively it does so, so even if Wi-Fi is a little poor, it will quickly switch to data.
Set a data limit: If you don't want to exceed your contract data, head into settings > connections > data usage and tap on "mobile data usage". Here you can set your data limit and the date your contract renews.
View your Wi-Fi data usage: In settings > connections > data usage, select Wi-Fi data usage. This will let you see how much data you're using through Wi-Fi and which apps are using it.
Enable download booster: If you're looking for download booster to use Wi-Fi and mobile networks simultaneously for big downloads, head into settings > connections > more connection settings and you'll find the option.
Turn on Wi-Fi calling: If you're in a location where the network reception is poor, but the Wi-Fi is great - like a basement - then Wi-Fi calling could be useful. Head into phone and open the settings at the end of the search bar in the top right corner. Scroll down to the bottom where you'll find Wi-Fi calling. Turn this on - but remember you'll need the function to be supported by your network/carrier for this to work.
Samsung Galaxy Note 9 storage tips
The Note 9 offers 128GB of internal storage, with a tray that accepts both the SIM and microSD, making it easy to expand your storage. Samsung doesn't support Android's adoptable storage feature.
Explore what's on your device or SD storage: The easiest way to view the content of your internal storage or SD card is to open the My Files app. Here you'll find my device, microSD, different categories as well as OneDrive, Google Drive and Samsung Cloud Drive (if you sign-in). You'll see folders and files for each storage type and you're free to explore.
Move an app to SD card: If you want to move apps to the microSD card to make more space on your internal storage, head into settings > apps and tap on an app. Within the app's details you'll find a storage section. Tap this, then "change" and you'll be able to select the SD card. The phone will then move the app to external storage.
Clean your storage up: To clean up your storage, head into settings > device maintenance and tap on storage. Here you'll find an option to clean the contents and remove files you don't need.

Samsung Galaxy Note 9 battery tips
Battery life is the Achilles heel of modern smartphones. The Note 9 has a 4000mAh battery, but there's a lot you'll want to do to make sure you're not wasting it. The Note 9 has a device maintenance area to take care of the hardware, as well as a power saving feature. Here are some top battery tips.
View what's eating battery: Head into settings > device maintenance > battery and tap battery usage. This will show you the predicted battery usage based on your 7-day averages. This is a fairly standard Android feature and shows you both hardware and apps that are eating battery.
Kill battery-hungry apps: Head into settings > device maintenance > battery and at the bottom of the page you'll see the apps that have been chewing through the battery. You can tap on "save battery" and the apps will be put to sleep.
Engage power saving mode: Power saving on the Note 9 is similar to the Note 8 and Galaxy S9. Hit the button in the quick settings to select mid or max power saving. Or, head into settings > device maintenance > battery and you'll find the settings for those power saving modes. A long press on the quick settings icon also access the different options.
Customise power saving: You can customise how power saving works. Head into settings > device maintenance > battery and tap the level of power saving you want. A pop-up shows you what it will do - brightness, screen resolution, hardware throttling, background data, always on display - with the option to customise and change those five areas. You can set the max brightness to your preference, or deselect anything you don't want. For example, you might want background data to stay on, which you can do.
Turn on Wi-Fi power saving mode: Head into settings > connections > Wi-Fi > settings > advanced and you'll find the option to turn on Wi-Fi power saving. This will see how Wi-Fi is used and then predict when it can turn it off.
Enable fast charging: Head into settings > device maintenance > battery hit the menu and tap advanced settings > fast cable charging. If this is not turned on, the phone won't use fast charging.
Time till fully charged: Charge time is displayed when connected to a charger. Look at the bottom of the lockscreen and in the battery status screen. If you're fast charging, it will say so, and the estimated time left.