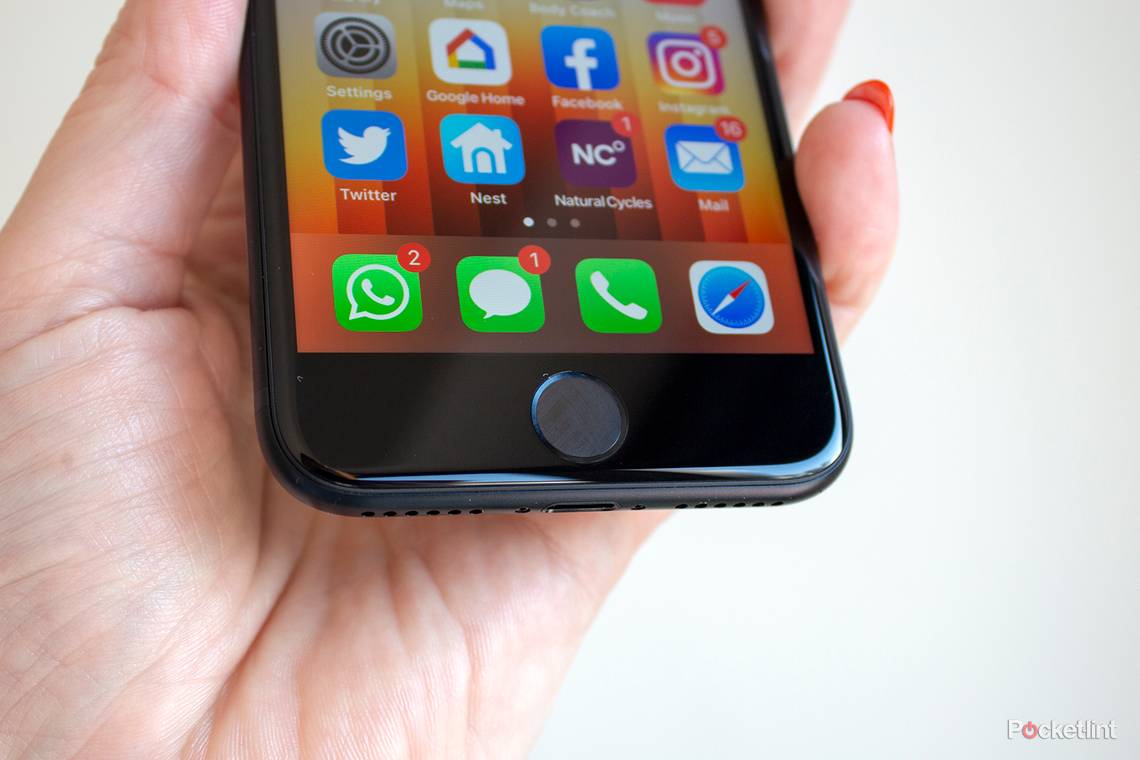
Despite the arrival of Face ID on the iPhone, Apple hasn't given up on Touch ID and the home button on the iPhone - after all, Apple stuck with it on the latest 2022 iPhone SE, as well as the 2020 iPhone SE.
With that in mind, here we are presenting the best Touch ID iPhone tips and tricks including the latest and older iPhone SE models, as well as the iPhone 6 and 6 Plus, 6S and 6S Plus, iPhone 7 and 7 Plus, and the iPhone 8 and 8 Plus.
Apple iPhone SE (2022) - 64GB
iPhone general tips and tricks
Enable True Tone display: To get the iPhone's screen to automatically adjust its colour balance and temperature to match the ambient light in the room, head to Control Centre by swiping up from the bottom of the display and force press the screen brightness slider. Now tap the True Tone button. You can also go to Settings > Display and Brightness and toggle the "True Tone" switch.
Turn on dark mode: To turn on dark mode, open Settings > Display and Brightness > Tick the Dark Mode option at the top. If you tap on options underneath, you can set a schedule for when you want dark mode to turn on or off.
Charge wirelessly: To make use of the iPhone's wireless charging capabilities (iPhone 8 or later), you'll need to buy a wireless charger. Any Qi charger will work, but to charge more efficiently you need one optimised for Apple's 7.5W charging (newer MagSafe iPhone chargers can charge at 15W).
Enable 60fps 4K video recording: Head to Settings > Camera > Record Video and then choose the 4K at 60fps option to shoot at the highest resolution and frame-rate possible on an iPhone.
Shoot 1080p slow-motion at 240fps: Similar to the last one, head to Settings > Camera and then tap "Record Slow-mo" and choose the highest speed option. Now you can shoot 240fps slow-motion video at Full HD.
Portrait Lighting effects: To shoot Portrait Mode shots with artificial lighting effects, first go to shoot in Portrait mode. You can do this either by force-pressing the camera icon and choosing the 'Take Portrait' shortcut, or opening the camera app and selecting the Portrait option in there. Now you can just tap and hold the bottom of the frame where it says 'Natural Light', and scroll through the options.
Edit Portrait Lighting effects after shooting: Open any Portrait shot in Photos and then tap 'Edit'. After a second or two you'll see the lighting effect icon at the bottom of the image, tap it and swipe exactly as you did when shooting the image.
Fast charge it: If you have a 29W, 61W or 87W USB Type-C power adapter for a MacBook, you can plug in your iPhone 8 or 8 Plus, iPhone SE 2020 or iPhone SE (2022) using a Type-C to Lightning cable and watch it charge really quickly. Up to 50 per cent in in 30 minutes.
Set the screen brightness: Either bring up Control Centre and adjust the display brightness slider, or go to Settings > Display & Brightness > Adjust the Brightness slider.
Text Size and Bold Text: To change the default text size and whether you want all fonts to be bold to make the easier to read go to Settings > Display & Brightness > Bold Text.
10-day forecast in weather: Go to weather, and on any city swipe up. You now get to see the 10 day forecast as well as additional information like a mini weather forecast for the day, sunrise and sunset times and the chance of rain.
Choose a new wallpaper: To pick a new wallpaper, go to Settings > Wallpaper > Choose a New Wallpaper.
Get to Wi-Fi settings quickly with 3D Touch or Haptic Touch: If you've got an iPhone 6S, 6S Plus or later, you can force press on the Settings icon to reveal quick links to Bluetooth, Wi-Fi, and Battery settings. The move makes it really speedy to jump to the wireless settings.
Disable contact photos: You can toggle contact photos on or off on iPhone 6 and later. To change the setting, which is on by default, go to Settings > Messages > Show Contact Photos.
Go back to apps: When you open a link or tap a notification while using an app, you'll be brought to a new app in order to view the information in full detail. You'll also see a 'Back to...' button at the top left of the just-opened app, giving you the opportunity to tap it and instantly go back the app you were using.
Track your reproductive health: The Health app has a Reproductive Health tab, with options for basal body temperature, cervical mucus quality, menstruation and ovulation, and more.
Delete an alarm: Apple's swipe-to-delete gesture works in the Clock app. To delete an alarm, swipe left on the alarm.
Search in Settings: The Settings app has a search field at the top which can be revealed by pulling down on the Settings menu. Use it to find the switches you need.
Enable Low-Power Mode: The Low Power Mode (Settings > Battery) lets you reduce power consumption. The feature disables or reduces background app refresh, auto-downloads, mail fetch, and more (when enabled). You can turn it on at any point, or you are prompted to turn it on at the 20 and 10 per cent notification markers. You can also add a control to Control Centre, and access it quickly by swiping up to access Control Centre and tapping on the battery icon.
Find battery guzzling apps: iOS specifically tells you which apps are using the most juice. Go to Settings > Battery and then scroll down to the section that gives you a detailed look at all your battery-guzzling apps.
Use a six-digit passcode: Apple has always given you the chance to set a four-digit passcode, but it also offers a six-number option, meaning hackers have a one in one million chance of cracking it, rather than 1 in 10,000. Go to Settings > Touch ID & Passcode > Change Passcode, and then select "Passcode Options".
Change how your screen responds to taps: A section under Accessibility in Settings lets you change how your screen responds to taps. You can tell your iPhone to ignore repeated touches. You can also increase the duration of taps before recognised, and much more.
Check your battery via the Battery widget: Within the widgets accessed with a swipe from left to right off the Home screen and lock screen, there's a card that lets you see the battery life remaining in your iPhone, Apple Watch and W1 or H1 chip-equipped headphones. If you don't like this widget, tap the Edit button at the bottom of the screen and then tap the delete button.
iPhone Control Centre tips
Add new controls: It is possible to add and remove controls from Control Centre. Head to Settings > Control Centre and then choose which controls you'd like to add.
Reorganise controls: To change the order of those controls you've added, tap and hold the three-bar menu on the right of whichever control you'd like to move, then move it up and down the list to wherever you'd like it to be.
Expand controls: Some controls can become full screen, just force press (i.e. press harder on compatible screens) on the control you want to expand and it'll fill the screen.
Switch on personal hotspot: By default, the connectivity control only has four options in it. If you force press to expand it, you'll get a full-screen control with two more options. Tap on the personal hotspot icon to switch it on.
Switch on Night Shift: To switch on Night Shift - which kills blue light, making it the screen warmer - force press the screen brightness control, then tap the Night Shift icon at the bottom of the screen.
Activate screen recording: One of the options you can add to Control Centre is Screen Recording. Make sure you add the control, then open Control Centre and press the icon that looks like a solid white circle inside a thin white ring. From now on it'll record everything that happens on your screen. Press the control again when you're done, and it'll save a video to your Photos app automatically.
Adjust flashlight/torch brightness: You can switch on your camera flash, using it as a torch, by opening Control Centre and tapping on the torch icon. If you want to adjust the brightness, force press the icon, then adjust the full-screen slider that appears.
Quickly switch where audio is played: One cool feature is the ability to change where music is playing. While music is playing, through Apple Music, Spotify, or wherever, tap the little icon in the top corner of the music control. This brings up a pop-up showing available devices that you can play through. This could be connected to earphones, Apple TV, your iPhone or any AirPlay device.
Set a quick timer: Instead of heading to the timer app, you can force press on the timer icon in Control Centre, then slide up or down on the full-screen to set a timer anywhere from one minute to two hours long.
How to access HomeKit devices: Swipe from the bottom of the screen up to reveal Control Center and then tap on the little icon that looks like a house.
Set a Focus: You can set a Focus so you don't get interrupted by certain apps or notifications when working, sleeping or taking some personal time. Swipe up from the bottom of your screen and tap on the Focus tile to set and customise a Focus.
iPhone Lock Screen tips
Get to older notifications: On your lock screen, as usual, new notifications pop up as standard. However, if you want to quickly get to older ones you've read, but ignored, swipe up on the lock screen and it'll show older notifications that haven't been cleared.
Clear older notifications: With the older notifications on screen, force press the little 'x' in the corner and tap the 'clear all notifications' pop up that appears.
Unlock your iPhone without pressing the home button: By default on Touch ID enabled iPhone and iPads, you have to press the Home button to get to the Home screen. You can change this by going to Settings > Accessibility > Home Button > and then toggling on 'Rest Finger to Open'. Now you don't have to press the button any longer.
Raise your phone to wake: Simply pick up the phone from an off state and it will wake up showing you all the notifications you've got on the Lock screen. To turn this feature on or off go to Settings > Display & Brightness > Raise to Wake.
How to quickly access the camera from the lock screen: Simple. Anywhere on the Lock screen swipe from right to left
How to access widgets on the Lock Screen: Again really simple. Anywhere on the Lock screen swipe from left to right.
How to unlock your phone but stay on the Lock screen: A curious one, but Touch ID users can unlock their iPhone without going to the Home screen. To do so put your finger on the Home button but don't press on it. A small padlock icon at the top of the screen will disappear, but you won't be taken to your apps Home screen.
How to add/remove widgets: A swipe from left to right on the Lock screen will show widgets from any apps that support them. To add, remove or reorganise, swipe left to right on the Lock screen and then scroll all the way to the bottom. Tap on the edit button to customise which widgets show and in what order.
Quick Reply: When a notification comes in - depending on whether it's enabled by the developer - you can reply immediately without having to open the specific app. To do this, pull down the notification to reveal the actions you can take. Or, from the Lock Screen, you can force press or press and hold the notification and tap 'reply', then start typing.
Clear individual notifications from the Lock Screen: You can clear an individual notification from an app by simply swiping from right to left and then tapping 'clear'.
iPhone Home Screen tips
How to remove stock apps: You can remove some of Apple stock apps like Stocks, Compass and others. To do so, simply tap and hold on the app icon until it starts wiggling and then tap the 'x'. You will be asked to confirm your decision. To get them back, simply search for the app in question in the App Store.
Crop and markup screenshots: Take a screenshot by pressing the Home Button and power button simulatenously, then a small preview screenshot appears in the bottom left corner. Tap it and then use the tools shown to draw, write on, or crop the image.
Dismiss screenshot preview: To get the little screenshot preview off your screen, just swipe it left. Hey presto! It's gone.
iPhone Messages tips
We have a full feature on Messages tips and tricks, but here are a few worth taking note of.
How to add effects to iMessages: To access effects, press and hold the send icon after you've written a message. Here you can switch between Bubble and Screen effects to apply them to your message.
How to mute specific conversations: In your main Messages inbox, swipe left on any conversation you want to hide notifications from then tap the bell icon. It's really useful if you're part of a particularly persistent and chatty group message.
You can also press the person's profile icon at the top of a conversation, then scroll down and toggle on the Hide Alerts button. This works for SMS as well as iMessages.
Send a picture to someone: To the left of the text input field in Messages you'll see a small camera icon. Tap it, then you have the option to take a picture or you can tap on the gallery icon in the top left of the screen to scroll through recently shot photos. To the left are shortcuts to the Camera app or your Photo Library.

How to Markup a picture in Messages: You can Markup or quickly edit photos before sending them in iOS. To do so, choose a photo and add it to your message. Before you send, tap on the photo and you'll get the choice to Markup (i.e. draw on it) or edit it.
Draw and send someone a picture: In Messages you can also send people drawn pictures like Apple Watch users can. Tap the little App Store icon to the left of the message input field and the app tray will appear below. Look for the small heart logo with two fingers on it at the bottom, tap it and then start drawing. To make the black canvas bigger press on the small arrow above the black canvas.
How to draw on a video you want to send someone in a message: Follow the instructions above, but instead of drawing on the canvas straight away press the video camera icon. You can then record a message and draw on it at the same time.
How to send someone a kiss: In Messages you can not only send someone a drawing or a video, but also a series of shapes or patterns, including a kiss on the screen. To send a kiss, go to the black canvas (see above) and tap with two fingers where you want the kiss to appear. There are other elements too like two fingers held on the screen gives you a beating heart, but two fingers swiped down the screen breaks that heart. There are plenty to try, so go experiment.
How to access apps in iMessage: In any Messages conversation you'll see all of your iMessage apps in a toolbar along the bottom of the screen. Swipe left or right to find the app you're looking for. If you're typing, you'll find the little "A" App Store icon to the left of the text field. Tap on it to bring the apps up.
- iMessage apps: Which should you download first and how to install them?
How to react to a message: Double tap on any individual message you receive, and you'll reveal a selection of icons including a heart, thumbs up, thumbs down, Ha Ha, !!, and ?. Pressing one will add it to the message for the other person on iOS to see. Pressing it again will remove the reaction.
How to reply to a specific message: Similar to above, double tap on any inidividual message you want to reply to and tap on 'reply'. The message you're replying to will then appear above the message you type.
How to share an article or YouTube video: Messages give you a more visually attractive sharing option, in other words, pasting a link into a message will expand it so the receiver can see what they are getting. If it's a YouTube video they'll be able to watch it right there in Messages.
How to share your location: You can quickly share your location within a message by heading to any conversation or message thread. Tap the contact's name at the top and tap on 'Share My Location' or 'Send My Current Location'.
How to turn on Send Read Receipts: You have the option to manage Send Read Receipts individually. To manage them for different people go to a Message conversation, tap on the contact's name at the top. From here you can scroll down to toggle on or off the 'Send Read Receipt' option.
What time?: View what time a message was sent by dragging from right to left on the conversation screen.
Quick Voice message: If you press on the small mic button on the right of the text box you can start recording a verbal message. Lift your finger to stop and reveal a playback button. Once happy, either swipe up or tap the arrow to send it, or swipe left or tap the 'x' button to cancel.
See attachments: Go into a message thread/conversation then tap on the contact's name at the top. Scroll until you reach the bottom of the screen and you'll see any attachments/images you've shared with that contact.
See links and photos in Shared with Me sections of apps: Certain media, like photos, music, links and TV shows shared by people will appear in the respective apps in a Shared With Me section if you toggle on the option. Open a message thread, tap on the person's name at the top of the screen and scroll down to toggle on 'Shared with Me'.
Delete messages: Swipe from right to left in the Messages hub and then tap the bin icon to delete a message thread.
Delete individual messages: Open a message thread and press and hold a message you want to delete. You'll then need to tap on 'More'. This will allow you to select individual messages you want to delete. Once you have made your selection, hit the bin icon in the bottom left corner.
Delete older messages automatically: Settings > Messages and then scroll down to the Message History section. Tap on the Keep Messages option and choose between Forever, 1 Year, or 30 Days.
Automatically delete audio or video messages: By default, Apple sets it so that once you've sent an audio message it deletes from your iPhone or iPad after two minutes. If you want to keep the message go to Settings > Messages and scroll down to the Audio Messages section. Tap on Expire and then choose between 2 minutes or Never.
Raise to listen to audio messages: It's on by default, but you can turn off the ability to listen and reply to incoming audio messages by raising your phone. To turn it off go to Settings > Messages and toggle Raise to Listen.
Blue vs green: Blue bubbles are for iMessages, green are for regular old-fashioned SMS messages.
Send iMessage as SMS: If you are having trouble sending your iMessages (over data), you can opt to revert to sending the message as a SMS instead. Go to Settings > Messages and scroll down to Send as SMS. Toggle this on and a text will be sent instead of iMessage if iMessage isn't available.
iPhone Photos and Camera tips
We have a full feature on Photos tips and tricks, but here are a few worth considering.
Change Live Photo effects: You can change from the default Live Photo effect. Go to your Photos app, open a Live Photo and tap on the Live tag in the top left corner of the photo to reveal three different effects: Loop, Bounce and Long Exposure.
Keep the original photo while using Live Photo effects: Once you choose one of the other Live Photo effects, it saves it on your phone as a video, not a photo. If you want to keep the original shot as a still photo as well, just hit the share icon in the bottom left and tap 'duplicate' and save another copy of the original photo. (You'll need to do this before you change the Live Photo effect - or just go back to the original Live Photo style and do it then).
How to apply a filter to a Live Photo: You can apply filters to Live Photos and still keep them as a Live Photo. To apply a filter, go to the photo in question, tap 'edit' and tap the three circles at the bottom of your screen. You can then select the filter you want.

How to quickly launch different camera modes: Press firmly on the camera app and you'll get a few choices, including Take a Photo, Record Video and on some models like the iPhone SE (2022), 'Take Portrait' instead of the regular photo option.
How to Merge People in Photos app: Apple Photos can detect people and places. If you find that the app has picked out the same person but says they are different people you can merge the albums together. To do this, go to the Photos app > Albums and select People. Tap on 'Select' in the top right of the screen and then select the images of the people you want to merge.
Remove people in Photos app: Go to Photos App > Albums > Select People. To remove a person, tap on 'Select' and then tap on the people you don't want to see before tapping on 'Remove' in the bottom left of your iPhone screen.
How to share a Memories movie: The Apple Photos app automatically creates a mini slideshow for you that can then be shared as a video. Go to the Memory you want to share - you can find them in the For You tab, tap on the main title image to play the memory. When it's playing, select the share icon at the top of your screen.
How to create a Memory Mix: You can either opt for the default movie style from Apple or change it to fit a handful of different styles. Head to the Memory you want to edit, tap on the main picture to play the video, then tap on the video again when it's playing. You'll now see a music note in the bottom left corner that allows you to play around with the song choice and creat a mix.
Editing photos: Find the photo you want and tap 'edit' in the top corner. Here you can press on the wand at the bottom to auto enhance your photo or slide across from the wand to access different edit options, such as exposure, brilliance, highlights and contrast, among others.
Straightening your photos: You can quickly and easily straighten your photos. To do so, open Photos, select the image you want to crop and press 'edit' in the top right corner. From here, select the cropping tool at the bottom.
Search Photo albums: Go to the Photos app and press on the magnifying glass in the bottom right corner. Immediate suggestions include narrowing your image results by One Year Ago and Trips, for example. However, you can type in lots of different searches like place names, people or months. Or a combination.
Ask Siri to fetch a photo for you: Siri can search your photos based on their information and criteria. Ask her to find a specific photo from 14 July 2015, for instance, and she'll do just that. Amazeballs.
Favourite photos: If you've got photos that you want to mark to show others quickly later rather than searching or scrolling for them you can favourite them instead. To do this, simply find the image you want to favourite and press the heart button below the image. To find them quickly when you go into the Photos app, press on the Albums icon at the bottom, then select the Favourites album.
Better viewing Shared activity: Turn the iPhone or iPad sideways. It looks nicer.
Quickly finding a photo in Years: Go to the Photos app and tap on 'Years' in bottom left corner. You'll then be able to see all the years you have taken photos in.
See where you took a photo: In the Albums section of the app, tap on the 'Places' album. Here you'll find all of the locations you've taken photos in and which photos were in which part of the world. Zooming gives more specific locations, while tapping 'Grid' lists the locations in that particular view.
Hide a photo: Find the photo you want to hide from Photos, Collections and Years, and tap on the share icon in the bottom left. You can then scroll down the options till you find 'Hide'. The photo will still available if you head to Albums and scroll down to Hidden under Other Albums at the bottom.
Turn on iCloud Photo Library: To turn on the iCloud Photo Library feature that means all your photos are automatically uploaded and backed up to the iCloud go to Settings > Photos and then toggle the iCloud Photo Library option.
Take a Live Photo: Your iPhone camera can capture 1.5 seconds before and 1.5 seconds after a photo in order to capture a 'Live Photo' with a sense of movement. To take a Live Photo from the Camera app, tap the Live Photo button in top right corner (looks like a set of diffusing rings) to toggle it on, and then tap the shutter button.
View Live Photos: Once you have taken a Live Photo, you can view it in the Photos app on your phone. Open the image, then hard press on the photo to play it.
Create a time-lapse: A setting in the camera app lets you create a time-lapse video with little to no effort. Just swipe sideways in the camera app to reveal the Time-Lapse mode. Once you've worked out what you are going to film press the record button. You should film for at least 30 seconds to see the effects.
Record video at 60 fps: With any iPhone newer than iPhone 6 and 6 Plus, Apple offers you the chance to record 1080p at 60fps but turns it off by default. To turn it on go to Settings > Camera > Record Video and then select the '1080p at 60fps' option.
Record 4K video: Some newer iPhone models allow you to shoot video at 4K resolution. Go to the same option as above, but choose '4K at 60fps'.
Change Slo-Mo speed: Newer iPhones allow you to record in Slo-Mo mode, to change the speed, go to Settings > Camera > Record Slo-mo.
AE/AF Lock: To change the exposure or the focus of your shot, tap anywhere on the screen and it will change instantly. To lock that exposure or focus (great for dramatic panoramas) press and hold on the screen until the square box 'locks in' - you'll see an AE/AF Lock tag appear at the top of the screen.
Changing exposure on the fly: Once you've found your focus point (the big yellow square) in the Camera app, press on the small sun icon and swipe up or down to change the exposure setting. Up to make it brighter, down to make it darker.
Activating Timer mode: In the Camera app there is an icon that looks like a stopwatch. You will need to tap the arrow at the top of the display to see the option. Once you've got it, tap it, then choose whether you want a 3 second or 10 second timer.
Burst Mode: Users can snap photos in Burst mode by either holding their finger on the shutter or on the volume key to take a burst of photos as the action happens. Once you've taken a Burst of photos you can then choose your favourite one(s). Tap on the gallery icon in the bottom of your camera app, and tap 'select'. Tap on the photos you want, then hit 'Keep only X favourites' to save only the ones you've chosen.
Quickly start recording video: You can quickly start recording video by swiping right on the shutter button in the camera app.
Easily select multiple photos: In your Photos app, in an album or collection, tap 'Select' and swipe your finger across the screen to select many photos at once.
Exit photo preview: When browsing your pictures in the Photos app, you can enlarge a photo in the grid to see it full screen, but you can also easily swipe down on preview to toss it away and return to the grid.
iPhone Notes tips
Quickly create a checklist: Force press on the Notes app icon and choose 'New Checklist' and then start creating your checklist immediately.
How to share and collaborate on notes: There's a share icon within Notes that looks like the silhouette of a person in a circle and a '+' icon next to it. Tap on the three dots in the circle in the top right of the note, and tap on 'Share note' from the options. You can add contacts who can view or make changes in real time.

Turning on passwords in Notes: To password protect Notes, go to Settings > Notes > Password. Here you can set a default password for all your notes. You can enable Touch ID too.
Once you've turned the feature you have to individually enable the password lock on the Note itself. To do this go to the Note in question, and press the three dots in the circle in the top right of your screen. You'll then need to tap on the 'Lock' icon. You'll need to enter your password to lock the note and press OK. Next time you access it you will need the password.
Sketch in Notes: Open the Notes app, press on the new Note in the bottom right corner and then tap on the pen in the circle to create a new sketch or handwritten note. You can then scribble away until your heart's content.
Save attachments to Notes: The system-wide Share button offers support for Notes. So when in Safari, for instance, tap the Share button to save attachments, such as a link or document, to a new or existing note.
iPhone Mail tips
How to check unread emails in Mail: Go to any of your inboxes in the Mail app and tap the small circle icon with three bars in it decreasing in size in the bottom left of your screen. Now it will show you only your unread messages.
How to reply to a specific email in a threaded message: There's a threaded Mail feature in iOS Mail that allows you to reply to messages within the thread rather than just the latest one. Go to a conversation thread and then swipe left on an individual message to reveal a reply button, a flag button and a delete button.
How to have multiple emails on the go at once: You can have multiple emails on the go at once, handy if you are in the middle of replying to someone and then have to send a quick email in between.
On an open email that is being composed drag down from the subject line to dock the email. You can keep doing this. When you want to access one of those emails, or see what you've got open, drag the one on top down further and you'll get a view of all of the emails you are working on.
Mark as Read: In your inbox swipe from left to right to reveal a 'Read' icon. If it's a conversation you will have to do this any time there are unread messages.
More, Flag, Trash: Swiping from right to left reveals quick actions to let you do a number of things. More brings up a secondary menu to let you reply, forward, flag, mark as unread, move to junk, or notify you of future messages in this conversation while Flag and Trash let you do just that.
Quick delete (Trash): Swipe left on any email in your inbox, and continue swiping until you've made it the whole way across the screen.
Changing the swipe options: You can also change what happens when you swipe left or right in Settings. Go Settings > Mail > Swipe Options and then set your Swipe Left command and your Swipe Right command. Options are limited, but it is something.
Reply notifications: If you are waiting for a specific response from an email and don't want to have to keep checking your phone every two minutes, you can opt for your device to notify you. In any message you've received, tap on the arrow icon at the bottom of the screen and then select Notify Me from the options. Confirm your decision and when they reply you'll know about it.
Time Zone override: Time Zone Override when on, will let you always show event data and times in the selected time zone. When off, events will display according to the time zone of your current location. If that sounds like something you want go to Settings > Calendar > Time Zone Override and toggle away.
Build out your contacts book: When you get a mail from someone and they've got a signature, Apple reads that information and asks you whether you want to add it to a contact. If you don't want to, you can choose to ignore, but if you do, press on the Add to Contacts button at the top of the screen.
Search: Drag down in your inbox to reveal a search box. You can now search your entire inbox for a keyword rather than just To, From, Subject. You can also limit your search to All mailboxes or the current mailbox you are in. Furthermore you can also limit it to conversation threads.
Mark all as read: You can mark all as read in Mail. Yay. In a mailbox, or the combined inbox, you just tap 'Edit' at the upper right, then tap 'Select All' in the top left, followed by 'Mark' in the lower left corner and choose choose 'Mark As Read' from the pop-up menu and all your messages should be marked as read.
Use Mail Drop on iOS: Mail Drop was introduced in Mac OS X to let you easily send large email attachments via iCloud. That same feature is available in the iOS Mail app, letting you attach a large file (5GB to 20GB). When you attach the file, you'll see a popup window with the option to use Mail Drop. Simples.
iPhone Keyboard tips
Swipe to type: For those with a compatible iOS 13 or later device, you can swipe to type. Simply keep you thumb or finger on the keyboard and swipe from one letter to the next. Once you have finished a word, lift your thumb or finger off and then put it back on the keyboard for the next word.
Go one-handed: The QuickType keyboard lets you type one-handed, which is great on the bigger devices. Press and hold the little emoji icon and select either the left or right sided keyboard. It shrinks the keyboard and moves it to one side of the display. Go back to full size by tapping the little arrow.
Switch off one-handed: If you never want the option to go one-handed, head to Settings > General > Keyboard and toggle the 'One-handed keyboard' option off.

Use your keyboard as a trackpad: You can use the keyboard area as a trackpad to move the cursor onscreen. It works anywhere there's text input, and saves you having to try and tap the exact location you want to start editing. Just force press the space bar and move the cursor around.
Picking your Emoji colour: To access particular emoji with skin tones, the go to the emoji keyboard in any app and long press on the emoji you want to use. If it has alternative options they will show.
Adding third-party keyboards: Install the app (SwiftKey or Gboard are good) and follow the instructions in the app. At some point it will ask you to go to Settings > General > Keyboard > Keyboards and add the third-party keyboard.
Accessing additional keyboards beyond Emoji: If you have more than three keyboards installed, the keyboard will show a globe icon next to the spacebar. In any app that has a keyboard tap on that globe icon and then again to reveal the next keyboard you've got installed.
Disable keyboard animations: Apple's keyboard has a pop-up character animation that serves as feedback when you tap the keys. You can shut it off though by going to Settings > General > Keyboard > toggling off Character Preview.
Text replacement shortcuts: One of iOS' most useful keyboard solutions is creating shortcodes that turn into full words or phrases. Go to Settings > General > Keyboard > Text Replacement. We find it useful to have one for an address that fills in automatically whenever we misspell "addresss", adding an extra "s" at the end.
Apple Maps tips
How to set preferred transport type in Apple Maps: If you find you only ever use Apple Maps when walking you can set the preferred transport type to be just that. To change it between Driving, Walking, and Public Transport, go to Settings > Maps and pick the one you want.
Us ARKit in FlyOver: A few years ago, Apple developed its own Maps app, complete with Flyover; virtual 3D versions of major cities. It's possible to look around 3D cities just by moving your iPhone thanks to this feature. Search for a major city - like London or New York - then tap the "FlyOver" option. Then all you need to do is move your device and look around the city.
Use indoor maps: You can now use indoor mapping to find your way around major malls or shopping centres. It's limited, but you can try it in Philadelphia International Airport and Mineta San Jose International Airport. To use indoor maps, just search for a supported location and pinch-to-zoom in until the outdoor areas go dark grey. Now you can see inside the building.
Move between building levels on indoor maps: Once you're inside a building map, you'll see a number in the right side of the screen. Tap it, and then choose a floor level.
Apple Music tips
How to access your entire music library: To see all the songs, albums, and playlists that you added from the Apple Music catalogue, as well as any music that you bought from iTunes, including CDs that you ripped, simply tap the Library tab from the app's menu bar along the bottom.
How to edit your Library categories: To clean up your library and specify which categories you'd like to see at a glance, such as genres, artists, or song, tap the 'Edit' button in the top right of the Library screen, and then toggle on/off your preferences.

How to find your downloaded music: If you only want to see the music that's physically on your device, tap the Library tab from the app's menu bar along the bottom, and then tap Downloaded Music.
How to create a new playlist: Going on a road trip and want to make a playlist? Easy. Tap the Library tab from the app's menu bar along the bottom, then tap Playlists, and select New Playlist. From there, you can add a playlist name, description, music, and toggle on/off whether you want the playlist public.
How to find Apple's curated playlists: The 'Listen Now' tab found in the menu bar along the bottom is a place where you can go to in order to find music suggestions hand-selected by the Apple Music team. Suggestions include a curated favourites mix, daily playlists, artists spotlights, and new releases, all of which target you and are tailored to your music preferences.
How to search in Apple Music: Tap the Search icon in the menu bar along the bottom in order to access a dedicated search field, where you can manually type-in artists' names, album titles, etc.
How to find top music charts: Go to the Browse tab in the menu bar along the bottom, and then tap 'Charts' to see a regularly updated list of the most popular songs on Apple Music.
How to find top music charts by genre: By default, the Charts section in the Browse tab shows you all genres. But you can choose a specific genre, such as Blues, by tapping the 'All Genres' button in the top right and selecting your genre from the list that appears.
How to find videos: Apple Music isn't just about music. It's also about music videos and other video content. Go to the Browse tab in the menu bar along the bottom, and then scroll down to 'Music Videos' to see new videos on Apple Music and top music videos.
How to find the Music 1 radio station: Apple Music offers a 24/7 live-streaming radio station called Music 1 - formerly Beats 1. To access it, tap the Radio tab in the menu bar along the bottom, and then tap the Music 1 thumbnail.
How to find radio stations: Apart from Music 1, Apple Music offers stations that are based on genres and different themes. You can find them under the Radio tab in the menu bar along the bottom.
How to share an album: Want to share an album via Twitter, Facebook, or wherever? Tap on any album, and then select the button with the (…) three dots at the top. From there, tap Share Album and select how you'd like to share it.
How to add an album to a playlist: You can add an entire album to a new or old playlist. Just tap on the album, and then select the button with the (…) three dots at the top. From there, tap 'Add to a Playlist', and then select which playlist (old or new) you want to add it to.
How to download an album to your Library for offline listening: Tap on the album, and then select Add to Library. After you've done that, you can tap the cloud with the arrow pointing downwards to download it.
How to love an album: You can tell Apple Music if you love an album so that it can better tailor music suggestions to you. Tap on any album, and then select the button with the (…) three dots. From there, tap Love.
How to create a station from a song: Tap on any song, and then from the music controls menu (tap it along the bottom to make it expand into a full screen card) select the button with the (…) three dots in the upper corner. From there, tap Create Station. This will create a radio station based on that specific song.
How to share a song: Want to share an album via Twitter, Facebook, or wherever? Tap on any song, and then from the music controls menu (tap it along the bottom to make it expand into a full screen card) select the button with the (…) three dots in the upper corner. From there, tap Share, and then click how you'd like to share.
How to add a song to a playlist: Tap on any song, and then from the music controls menu (tap it along the bottom to make it expand into a full screen card) select the button with the (…) three dots in the upper corner. From there, tap Add to a Playlist, and then select which playlist (old or new).
How to download a song to your Library for offline listening: Tap on the '+' symbol next to any song to add it to your Library. You can then tap the cloud with the arrow to download a song.
How to love a song: You can tell Apple Music if you love a song so that it can better tailor music suggestions to you. Tap on any song, and then tap it along the bottom to make it expand into a full screen card) select the button with the (…) three dots in the upper corner. From there, tap Love.
How to see lyrics for a song: Can't tell what the artist in a song is saying? Check out the lyrics in Apple Music. Tap on any song, and then tap along the bottom to make there controls expand into a full screen card. Lyrics will then appear automatically.
Switch audio source for a song: Want to change from your iPhone to a connected speaker? Tap on any song, and then select the arrow button with radio waves (it sits below the volume slider). From there, pick your audio source.
Share an artist: Like songs and albums, you can share an artist with a friend via social networks and messaging apps. Just tap on any artist's page (search for an artist, then click his or her name to access the page, etc), then tap the button with the (…) three dots next to their name, and select Share Artist. From there, pick how you'd like to share.
iPhone in bed/do not disturb tips
How to set the alarm based on when you go to sleep: The Clock app can remind you to go to bed and then wake you up 8 hours later for example. You can set a Sleep Schedule in the Health app, or you can set a Sleep Focus by swiping up from your Home Screen, tapping on the Focus tile and setting up the Sleep Focus to meet your needs.
How to schedule Night Shift mode: Night Shift can automatically shift the colours of your display to the warmer end of the colour spectrum after dark. It's not on by default so to turn it on, go to Settings > Display & Brightness > Night Shift. Here you set when you want it scheduled to run or 'Manually enable it until tomorrow'. You can also set the warmth of the display from 'Less warm' to 'More warm'.
Schedule Do Not Disturb or Sleep Focus: If you want to be sure random email messages and Facebook alerts don't wake you up in the night, go to Settings > Focus > Set up the Sleep or Do Not Disturb schedules to fit your routine.
Set up ScreenTime: You can set limits on app use as well as see how much time you've spent in certain apps. For lot more on this check out our complete guide to ScreenTime.
Siri tips
Translate: Siri can translate a handful of languages into American English. Just ask 'Hey Siri, how do you say [phrase here] in German/Spanish/Italian/Japanese/Chinese."
Hey Siri: To get Siri working by just shouting at it rather than pressing a button go to Settings > Siri & Search > Listen for "Hey Siri".
Disable Proactive Assistant: If you don't want Siri to suggest apps, people, locations, and more when you use the Spotlight Search, you can always disable Siri Suggestions. Open Settings > Siri and Search. There is a Suggestions from Apple section that you can toggle various options on or off.
Tell Siri to remember what you see on screen: Siri can set reminders. You know this. But she can also remind you about whatever is displayed on your device screen - whether it be a website or note. Just say "Siri, remind me about this," and she'll scan the page and add relevant details to your Reminders app.
Ask Siri to fetch a photo for you: Siri can search your photos based on their information and criteria. Ask her to find a specific photo from 14 July 2015, for instance, and she'll do just that.
Shut up Siri: Sometimes Siri is just as useful when she isn't speaking. Thankfully, a setting called Voice Feedback (Settings > Siri & Search > Siri Responses) lets you decide when she can use her voice. You can toggle the setting to always on, When Silent Mode is Off and Only with "Hey Siri".
Safari tips
Stop websites tracking you: Go to Settings > Safari and then toggle the 'Prevent Cross-Site Tracking' switch to the on position.
Move the address tab back to the top: Go to Settings > Safari > Choose the 'Single Tab' option to return the Safari address tab back to the top.
Access saved passwords: Thanks to iCloud, Safari has the ability to store your password across all your devices. Go to Settings > Passwords > Log in using your Touch ID scanner. Here you can see all the passwords that are saved, and manage them.
Find on Page in Safari: To find text in a Safari page, hit the Share button on a page to see a Find on Page option (it surfaces a pop-up over the keyboard).
DuckDuckGo: If you want to set DuckDuckGo as your default search engine over Google, Yahoo, or Bing, go to Settings > Safari > Search Engine and select the privacy-friendly search engine as the default.
Auto suggesting websites: Like Safari on the desktop, you can have the iPhone or iPad Safari recommend suggested search results as you type. It's on as default but if you don't want it, go to Settings > Safari > Search Engine Suggestions and toggle the feature off.
Auto suggesting apps: Likewise as you type in popular app names into the Safari search URL box, Apple will try and match that with apps you either have or might want. It's on as default, but if you want to turn if off go to Settings > Safari > Safari Suggestions.
Getting the website link quickly: Settings > Safari > Quick Website Search will determine whether Safari offers up website matches or not for you.
Making websites load faster or saving your data: Safari preloads the first hit of the search result to make loading your choice seem quicker. The downside is that this could use up data. If you want to turn it off go to Settings > Safari > Preload Top Hit and turn it off.
Scan your credit card: Rather than having to type all your details you can use the camera to scan your credit card. When it comes to entering the credit card details either press to auto fill if you are already using that feature with Keychain, or press it and then select Use Camera on the next menu you get.
Swipe forwards and backwards: Swiping from off the screen on to the screen from the left of the screen goes back through your browsing history while swiping from the right of Safari goes forward through your browsing history.
Close all Safari tabs: We love this tip. To close all open Safari tabs, open Safari and press and hold the two squares in the bottom right corner. You'll then see the option to 'Close All [number of tabs open] Tabs'.
Handoff and Continuity tips
Enabling Handoff between iOS devices: Go to General > AirPlay & Handoff and then toggle the Handoff box.
Accessing Handoff apps: On the Lock Screen press the app icon in the bottom left corner.
Allowing SMS messages on your Mac: To do this you need to enable the feature on your iPhone. Make sure you are running iOS 8.1 or later and then go to Settings > Messages > Text Message Forwarding. Find your Mac or iPad you want to allow access and pair the two devices with a security code. You'll now be able to see and send Text messages via the desktop.
iCloud tips
Turn on iCloud Drive: Go to Settings, tap on your name/ID at the top then go to iCloud. Here you can control which apps have access to your iCloud Drive and whether or not they can use Cellular / Mobile Data.
Manage your Storage: Go to Settings, then your name/ID > iCloud > Manage Storage. From here you can see how much storage you have, how much you have left, and choose to buy more.
Family Sharing: Rather than have your Apple account on all your family's iPhones and iPads you can set up Family Sharing for up to 6 people. Go to Settings then tap your name/ID at the top and choose the 'Family Sharing' option. You can read more about Family Sharing in our separate feature.
Secure iCloud Keychain Access: Go to Settings, then your name/ID at the top > iCloud > Keychain, and toggle it on or off.
Send last location so you can find it even when the phone is dead: There's cool hidden feature that will automatically send the last known location to Apple when your battery is critically low. Even if the battery dies as you've lost the phone behind the back of the sofa you can still at least have some idea where it got to. Go to Settings, then your name/ID at the top > Tap on Find My > Find My iPhone > Toggle on 'Send Last Location'.
Access iCloud Drive files: Go to the Files app then tap 'Browse'. Under the 'Locations' section, tap on 'iCloud Drive'. Here you'll see all the documents and files saved in your iCloud Drive.
Apple Pay tips
Pre-arm your payment: To help speed up your time at the cashier you can pre-arm your Apple Pay before you get to the counter. To do this go into Apple Wallet, select the card you want to use and then hold your finger on the Touch ID sensor. Once complete you have a minute to use the armed payment before it turns off.
Load multiple cards: There is no limit to the amount of bank cards Apple Pay can hold so keep loading them into Wallet.
How to access Apple Pay from Lock screen: To access Apple Pay on the Lock screen you can double tap the Home button. If you don't want this feature you can turn it off by going to Settings > Wallet & Apple Pay and turning off 'Double-Click Home Button'.
How to allow Apple Pay Payments on Mac: You can use Apple Pay on your iPhone to confirm payments on a nearby Mac. To ensure this is turned on go to Settings > Wallet & Apple Pay and turn on 'Allow Payments on Mac'.
How to change the default Apple Pay card: Go to Settings > Wallet & Apple Pay and select the Default Card you want. If you only have one card it will automatically be the default card.
How to set an Express Travel Card: It's possible to set an Express Travel Card so you can just hold your iPhone against a compatible payment terminal, like the London Underground or New York Metro, without having to unlock it. Go to Settings > Wallet & Apple Pay > Express Travel Card > Select the card you want to pay for your travel with.
Select an Apple Pay payment card: When paying with Apple Pay, you can quickly choose which card you want to use just by double-clicking the home button while on the lock screen and swiping to the card you want to use. It'll bring up all your cards on your iPhone.