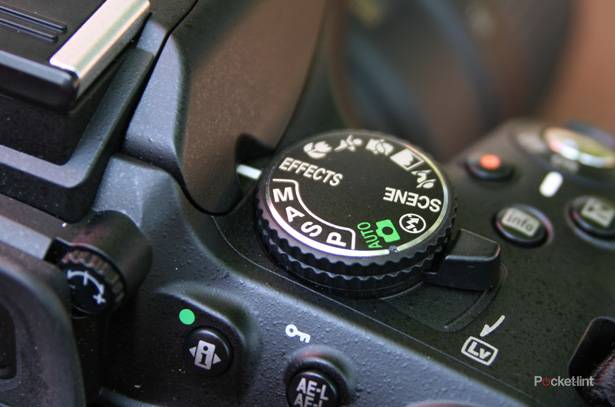
One of the features swinging onto the brand spanking new Nikon D5100 is the Effects shooting mode. It has it’s own position on the dial and has been highlighted to us by Nikon on the couple of occasions that we’ve seen the new DSLR, which we now have in our possession.
The Nikon D5100 sits as a rival to the Canon EOS 600D - they both have a lot in common, including a 3-inch vari-angle display around the back, the size and weight is similar, the price is pretty close and things like an external mic input and 1080p video capture is common to both.
We’re starting to hear people talking about where cameras go next. Performance, on the whole, is very good from DSLR cameras, even at the entry level where image quality is excellent and the range of technical shooting options are abundant. Entry-level DSLR cameras might not offer pro features like fast continuous shooting or weather proofing, but they are otherwise very well specified.
Effects shooting is something we’ve seen growing in popularity, especially when it means you can make something of nothing. Once you might have had to spend some time adjusting the image post-shooting, or waiting until the conditions were right, or have the right lenses or filters, but now with a little in-camera digital manipulation (or simply selecting the right settings) you get fun results with very little effort.
We have the new Nikon D5100 in our hands and we’re putting it through its paces for a full review, but we thought we’d bring you a little detail on the Effects mode whilst we're playing with it.
Miniature effect
Miniature is probably the most distinctive effect to appear recently. We’ve seen it sweep across camera manufacturers, recreating a tilt-shift lens effect. The great thing about the miniature effect is that it is so simple to use. We’ve found it works best if you get some height over your subject to give the miniature subject more context.

Essentially what you get is a band that is sharp with blurred surroundings. You can adjust the orientation of the focused band and the width, so you can play around and see what you get out of it. It's simple and gives impressive results pretty much straight away.
Selective color
Selective colour lets you pick out a colour detail in a scene, without having to layer and mask areas post-production. You can easily create that classic New York yellow cab or red London bus image straight out of the camera.

The colour selection requires you to switch to live view to select the colours you want to keep - you can select three by pointing the camera at the required colour and pressing up on the d-pad on the back. You can then adjust that colour on a scale, so you can adjust the impact of that colour on the overall picture.
Being able to select three colour points is really useful because you can highlight either different colours, or use it to select close shades of the same colour, for example, to get different parts of a leaf in shade.
Silhouette
As the name suggests, Silhouette is designed to recreate that classic shot where you catch the curves of your bikini-clad girlfriend perfectly silhouetted against the sky.

It’s perhaps less useful than some of the other shooting modes because if the conditions are right then getting that silhouette shot is relatively easy. What it does make it easier to do is grab that shot when the conditions aren’t really right, for example when you can't shoot close to the sun and you want to get a dramatic outline.
All you have to do is point the camera at a subject neatly framed against the sky (ideally) and it will be silhouetted rather than offering up the detail and colour you’d expect.
High key and Low key
High key shots are notable for their bright and happy feeling, ideal for making something appear light and cheery, and a notable lack of contrast. It’s opposite number is Low key, which is deeper, darker and moody.


Both effects are on offer in the D5100 so you can try to recreate low and high key shots without having to mess around with lighting and setting the environment to get the right shot. The two shots above were taken seconds apart in the same place but are dramatically different.
In practise these modes are more difficult to get effective results as simply as elsewhere - we found that high key was often over exposed and low key under exposed without the result being totally obvious. It does become more apparent as you play with it and like all things trail and error will soon help you pin it down.
Night vision
Night vision leverages our old friend ISO to increase the sensitivity beyond the normal realms, the aim being to get something out of a dark scene. If you turn to Night vision in day light the camera will tell you that the scene is too bright - but you can take a shot anyway, it just comes out in black and white.

So when night falls, you can head out and get some shots. It's more of a night vision goggle effect than a substitute for using a decent low ISO long exposure which would give you a decent result (the D5100 offers up to 30sec and bulb thereafter).
But what Night vision does do is make sure that the shutter speed doesn't make handshake too much of a problem. The shot above was a 1/15 exposure, which we wouldn't normally want to hand-hold but given that so much detail is consumed by the graininess it doesn't matter so much. We have taken some shots at slower shutter speeds in Night vision, but the results don't come out so well. We're still playing around with Night vision as we're not totally convinced by it at the moment.
Color sketch
Color sketch - forgive the spelling - can be used to create a striking effect that picks up on lines and edges and colours. The effects are fairly easy to reproduce in Photoshop (or similar) and the results out of the camera we found to be varied - some subjects work well, but if there is too much detail that is important it will get lost.

We’re still getting to grips with colour sketch, but we like the fact you can change the intensity of the colours and the thickness of the lines - we prefer to bang both up to the top for the most impact, but if you have the right subject, then the subtle approach might work equally well.
In camera editing, video
The Effects aren't just restricted to the Effects position on the dial, however. As the Nikon D5100’s video capture is triggered using the red button on the top, if you are in a particular effect then you get that effect in video too.
Again, miniature is the most straightforward giving you a great timelapse effect, but in video, the high and low key works remarkably well given the right scene. Both low key and silhouette in video give you a similar result, and colour selection works really well too. Color sketch gives a similar timelapse feel as miniature, but without the charm of tiny little things to marvel at and we feel creatively lost as to how you'd use it best.
Lurking in the menu are also a range of editing options too. These include applying a fisheye effect, the colour sketch again, colour outline which just picks up the edges of everything in the image, miniature effect, and colour select.
So if you don’t apply an effect when shooting you can apply them retrospectively. It means you don’t have to hook up to a PC, but obviously you’re working on the 3-inch display at the back of the camera so you can’t really see what the final full resolution result will be.
Summary
Overall, the Effects mode as a new feature in a Nikon DSLR adds some easy creative options. We’ve been fans of miniature for some time and the colour selection is certainly an easy way to add interest to a detail in a shot. Like all things, effects need to be used in moderation in our opinion. If you find yourself always shooting in the effects mode, then perhaps the fine detail and great colours the camera otherwise captures are somewhat lost on you.
We’ll be bringing you a full review of the Nikon D5100, with plenty of sample shots, as soon as we’ve finished with it, so stay tuned.
UPDATE: You can read the full review here.