Building your own gaming PC can be a super rewarding experience, not just because of the satisfaction of completing a build and turning it on, but also due to the proud feeling you get every time you game. Playing on a machine you built yourself is something special.
Building your own computer can also be a good way to save money over buying a pre-built system. If you don't have the cash to build an extreme gaming PC, but still want something with punch, then you've come to the right place.
In this guide, we'll be showing you how to build a mid-range gaming PC with the essential parts for a machine that will keep you gaming happily for a few years, without leaving you in a mountain of debt.
We'll be talking you through the steps, the things you’ll need to think about and any other considerations along the way.
|
Index |
|
Budgeting your gaming PC
Before you can get started, you'll need to consider your budget - this really is a key step! If you want to keep costs down, you'll need to think about the essential parts and the ones that aren't easy to upgrade in future. There's no point in building a good PC now, only to have to abandon it in a year or two because the foundations are massively out of date.
If you're looking to save money, you don't necessarily need the newest and best parts either. Older generations of CPU, motherboard and more might be cheaper but still work well enough to last you for a long time.
It's worth spending extra on the core parts of the machine at the start. You can always add more RAM, a better graphics card or more hard drive storage at a later date if you need to.
What components do you need?
Depending on your budget, you'll need numerous components to craft your new gaming PC. It's really important to do your research first to make sure everything fits and will work together and you don't waste money on things you don't need.

Gaming motherboards
The motherboard is the foundation of your new gaming PC. It works as the base for all the parts and will help control the system. Each device within the PC connects to it to allow the computer to function.
When choosing a motherboard, it's important not to skimp out. The motherboard is not the easiest thing to upgrade in future, as you'll have to tear down the entire system to do so. So buying a good quality one is important.
That said, a good way to save money is to look for a previous generation motherboard - the one that supports the last generation of CPU, rather than the current one. That'll bring the costs down without negatively impacting performance too much.
It's also very important that you thoroughly examine the specifications of the motherboard before you purchase other parts to ensure they'll not only fit, but also work with your system.
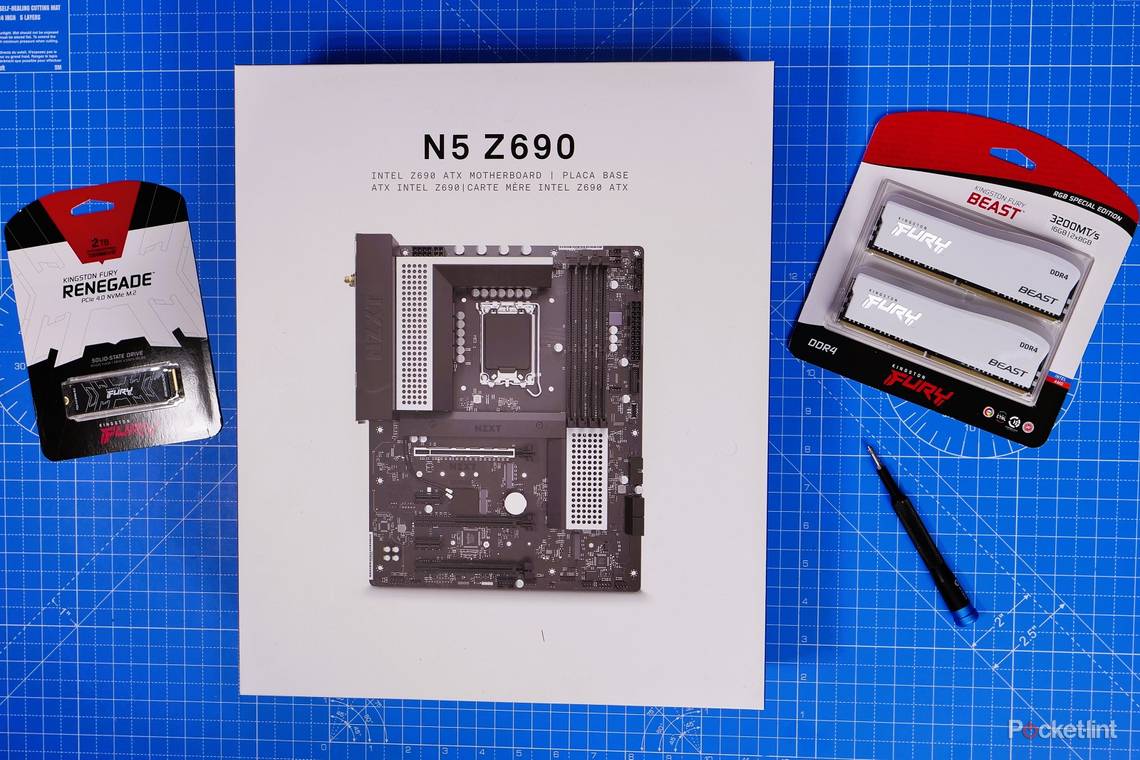
As an example, the motherboard we're using for the build covered later in this article is the NZXT N5 Z690 motherboard. This motherboard supports DDR4 RAM, and is fairly simple to set up, plus has a useful in-built I/O shield. That's three different things to bear in mind just in relation to one component.
Getting back to the RAM, though, this board's dual-channel support simply means two sticks of RAM work in pairs on the motherboard. Other versions of RAM include tri-channel and quad-channel. The latter will work in this motherboard as four sticks of RAM can fit, which is nice for future expansion.

Central Processing Unit (CPU)
Intel Core i5-13600K Desktop Processor 14 cores (6 P-cores + 8 E-cores) 24M Cache, up to 5.1 GHz
The Central Processing Unit (CPU), is the brain that powers your computer. The CPU can be one of the most costly parts of your PC build, and the smallest. You'll need to match the motherboard to the CPU.
There are two main manufacturers of CPUs - AMD and Intel. These manufacturers also make a variety of processors with different chipsets. In order to work out which CPU fits which motherboard you'll need to first pick the manufacturer then work out how much money you have to spend.
If you want to build a cheaper, but still powerful gaming machine, then you can opt for a previous-generation CPU. They'll still be capable but won't necessarily cost the big bucks.
For this build though, we're using an affordable mid-range Intel CPU from the current 13th-generation line-up. This isn't so cheap it'll lack performance but also won't destroy your bank account.
It is always possible to upgrade your CPU in future, but only purchase an upgraded processor that's the same socket as your motherboard or you'll fine it a bit tiresome. We've put together a guide on how to swap out your CPU here.

Random Access Memory (RAM)
Kingston Fury Beast RGB Special Edition 16GB (2x8GB) 3200MT/s CL16 DDR4 Desktop Memory Kit of 2 | Infrared Syncing | Intel XMP & AMD Ryzen Ready | RGB CTRL Software | KF432C16BWAK2/16
RAM is the memory of your gaming machine. It helps the PC to act quickly and efficiently as you game. The size of RAM is measured in GB. Most modern gaming PCs will run with at least 8GB of RAM as a minimum, but we'd recommend either going for 16GB or 32GB. Plenty for gaming, video editing or just for Chrome to hog.
If you're working on a budget, then there are ways to save money here. For example, it's worth looking at the recommended specifications of games you want to play, and future games being released soon. You can then build your PC to hit those specifications or slightly exceed them.
RAM is one of the easiest things to upgrade in future. All you'll need is enough spare slots on your motherboard and purchase of more RAM that matches in terms of size, frequency and model number. You'll then be able to double your RAM amount in future.

Power Supply Unit (PSU)
The power supply unit provides all the necessary juice your gaming machine needs. Every component needs to be plugged into it in order to run.
Don't risk cheating out on this part as buying a cheap PSU could result in the unfortunate and early demise of your machine. You also need to choose a PSU which has enough power to run your machine and all the parts inside it. PSUs are sold according to wattage, in other words, the amount of power they're capable of putting out.
Buy one that's too powerful and it won't run efficiently. Too weak and it won't give enough power to the parts which could see your machine turning off (or worse) in the middle of a game.
To solve any headaches, you can use this nifty calculator to suss out which one you need based on the components you plan on including in your machine.
Considering your storage options and requirements
There are a number of different options when it comes to storage for your machine. These are drives you'll use to store your games, videos, files and your operating system.
These are slightly different and vary in price as well as speed and storage size. We're going to assume you want something fast and modern but without massive expense. We'd recommend either standard SSDs or NVMe drives.

Solid State Drives (SSDs)
Samsung 250GB 860 EVO 2.5-inch Solid State Drive
Solid State Drives have no moving parts and can transfer files quickly, as well as load games swiftly and reduce any issues you might have with lag. These vary in size, the smaller ones are cheaper but are likely to fill up quickly if you have a large library of games. For the build below, though, we'll actually be sticking to M.2 storage.

M.2 NVME Drives
Kingston Fury Renegade 1TB PCIe Gen 4.0 NVMe M.2 Internal Gaming SSD | Up to 7300 MB/s | Graphene Heat Spreader | 3D TLC NAND | Works with PS5 | SFYRS/1000G
These are the newest and fastest sort of Solid State Drives. They're also the easiest to install and offer blisteringly fast load speeds that will reduce the time you spend staring at game load screens.
You can get them in various sizes but we'd recommend a minimum of 500GB or you'll soon find it has filled up, especially with modern game sizes.

Graphics cards (GPU)
Intel Arc A770 16GB PCI Express 4.0 Graphics Card
The GPU does the majority of the work when it comes to powering your games. New graphics cards are being released all the time and those components will help run the latest games on very high or ultra settings.
These are likely the most expensive single component you can buy though. But you don't necessarily have to have the newest or the best to get good results.
The graphics card is also one of the easiest parts to upgrade in future. If you build your machine well, you can upgrade your GPU every couple of years or so and keep the whole thing running for many happy years to come.
We're using an Intel Arc A770 for this build because it's remarkably affordable and offers great performance for your money.

CPU heatsink/cooling - DeepCool AG400
CPUs tend to get really hot when you're playing games - or, frankly just in regular use. Keeping them cool is essential to ensure the smooth running of your PC and an enjoyable gaming experience.
For a mid-range CPU in a case with good airflow we'd recommend trying a CPU tower cooler. Like this DeepCool aircooler. It's affordable, but still does a great job of keeping the CPU cool. It's also easy to install.

Computer case
Gaming PC cases are available in a range of different sizes, shapes, colours and with varying features.
The main difference is size. Cases are available in full-tower, mid-tower, ATX, micro-ATX, mini-ITC and more. For your first gaming PC build, we'd suggest using either a full-tower or mid-tower case. These are slightly larger and allow you more space to work, but also better airflow and will accept a wider range of motherboards.
We're using the NZXT H7 case as it's reasonably affordable, spacious and easy to build in.

Case cooling
NZXT AER P 120mm Static Pressure PWM Fan
As mentioned, many cases, including the NZXT H7, come with case fans already installed that can are plugged directly into the motherboard and powered to keep the case cool. There may also be space for extra fans if you want to add more to keep things really cool. Check the specs of your case, to see what size fans will fit in your case if you want to purchase extras.
This case comes with just two fans, one set up as intake and another as exhaust. You can buy more fans and add them to the front for more intake or go crazy and get extra for the top as well.
Keep your costs down by sticking with standard fans and avoiding RGB ones. This will also help with the installation process as it's much easier. This case can take three fans on the front, three on the top and one at the rear.

Anti-static wrist strap
One of the cheapest parts you'll buy. This is a strap that attaches to your wrist and you will use this while building your gaming PC. Static electricity that builds up in your body can fry electronics in your computer while you're building, so this is a worthwhile precaution.

How to build your gaming PC
Once you have everything you need, the next step is to start building. The first time you do this, it can be quite daunting. But we're here to help things go smoothly.
There are a few essential things to bear in mind that will ensure everything goes well:
- Building your own PC usually ends up with an excess of wires/cables, screws and parts that you don’t need. Don't panic if this happens.
- Complete PC builds may include cables that don't connect to anything and this might not be a problem. Again, don't panic.
- Use an anti-static wrist strap at all times.
- Don't start cable tying until the very end, in case you have something in the wrong place that needs to be moved.
- If the case has protective stickers on it, leave them on until the end to avoid accidental scratching while you're building.
- Keep all instruction manuals handy so you can easily reference them while you work.
- Keep any screws you remove in a logical place so you know where they are when they need to go back in.
To show you how to build your own gaming PC we're going to talk through each step of the build and how to put it together. This will vary slightly depending on the parts you're using, but will mostly require the same steps.
For this build we used the following components:
- Motherboard - NZXT N5 Z690
- CPU - Intel Core i5-13600K
- Case - NZXT N7
- RAM - Kingston Beast Fury RAM 16GB
- GPU - Intel ARC A770
- CPU cooling - DeepCool AG400
- M.2 NVMe drive - Kingston Renegade NVMe
- PSU - NZXT C850 Power Supply
Other things you'll need:
- Time - if this is your first build it can take as much as a day or two to do it correctly and get your PC up and running. Don't rush.
- Screwdrivers - most parts require a Philips head screwdriver to install.
- Anti-static wrist strap
Getting started with your PC build
To start off unbox your case, remove any extra cables and bits that came with it, then set it to one side.
Build in a place where you won't accidentally build up static electricity - so don't do it on a carpet if you can avoid it, for example. Also, be sure you wear the anti-static wrist strap throughout the build process. This clips to a radiator or any piece of metal that's grounded (a non-painted part of your power supply could work nicely) and works to disperse any static electricity build-up in your body to prevent damaging the important components.
Setting up the motherboard
Take your motherboard out of its box and remove it from the anti-static plastic bag it comes in. We find it's a good idea to use this as a mat to lay the motherboard on top on so it doesn't touch or scratch anything underneath while you work.
This next bit can be easy to overlook or ignore - ensure the motherboard manual is easy to access. You might think you're all sorted, but you will need this document. It's very handy to reference, especially when it comes to plugging cables into the right places later on.

Installing the CPU
The CPU might be the smallest thing in this build, but it's also really easy to install as long as you do it with care.
First, move the arm and lift the flap to open it up. Then go about installing the CPU.
Make sure it lines up properly and don't force it. You need to put it so the gold arrow points to the bottom left. You can only put the CPU in one way round, so you shouldn't be forcing it in. In fact, you should feel it just drop into place without any resistance.
With that done put the housing back down and reset the arm. The shield should then pop off as you do it.

Seating the RAM
Now comes one of the next easiest jobs in this build process. Installing the RAM. With a close look, you'll see from markings on the motherboard and instructions in the manual that the RAM needs to be installed in a certain order. For this motherboard, you need to fit the sticks in DIMM slots A2 and B2 first if you only have a pair of RAM sticks. Putting them in A1 and B1 will not work - you can see the different combinations in the motherboard's manual.
Take the RAM out and line it up with the slots. You'll see there are clips at the ends of the slots. Push these back to loosen things up before you put the RAM in. Once you seat the RAM it will make a satisfying click when fully inserted. Just like with the CPU, don't force things.

Installing the M.2 NVMe SSD
M.2 NVMe drives are blissfully easy to install. These storage drives get power straight from the motherboard and transfer data that way too, so there's no need for pesky cables.
Most modern motherboards have two or more slots for these drivers. The motherboard that we're using has four slots. You can find their location in the manual. One is immediately obvious as it sits just below the CPU with its own heatsink, and that's the one we'll be using.
Unscrew the heat shield from the motherboard by removing the two screws.
With the cover off you can install the drive. Simply click the drive in at a roughly 30-degree angle, then replace the heatsink cover with its screw to hold it in place on the other end. Hey presto, you've installed your storage.

Readying the CPU cooler
Another thing to do before installing the motherboard is to set up the CPU cooler. The first step here is to install the backplate. This cooler comes with an Intel backplate with adjustable stand-offs. Put them in the far corners then set it up with the pins through each of the four holes.
Flip the motherboard over and then use the plastic washers with 1700 written on them. Seat those over the stand-offs. Then the bracket needs installing on that.

There are four screws that need screwing into the stand offs. This is how you will attach the cooler. Make sure this is nice and secure before going any further.

Apply thermal paste
This is an essential step before fitting your cooler.
Apply a pea-sized amount of thermal paste to the middle of the CPU. You need to ensure there's enough so when you install the CPU cooler there's an even spread across the entire thing.

Now seat the cooler down on top of the CPU and on the mounting bracket. Make sure the fan is facing towards the front of the case. There are two screws on either side of the cooler that mount to the bracket, so tighten those.
There are two cables on the cooler. On plugs into the CPU fan spot on the motherboard.

The other is an RGB connector which clicks into the 5V RGB header on the motherboard in the bottom left.

Preparing your case
With the motherboard prepared, it's time to fit it in the case. The good news is that this is really easy with the board and case we've selected.

Installing the Power Supply Unit
Installing the power supply will be slightly different from case to case. But in this case, it mounts in the bottom with the fan facing downwards.
We'd recommend installing all the cables you'll be using before hand. This makes life easier as it's fiddly trying to plug cables in after you've installed the PSU in the case.
For this build you'd need:
- The 24-pin motherboard cable
- Two 8-pin CPU power cables
- One 8-pin PCIe cable (split for the GPU)
These are labelled on both the cables and PSU itself. Because the power supply is modular you only need to plug in what you're planning to use.
Push the PSU into the back of the case and hold it there while you screw it in place. You'll find four holes at the rear that you can tighten screws into to hold the PSU tightly in place.

Once that's done you can then run the cables around the case so they fit in the right place.
How to install the motherboard
Installing the motherboard requires you to line it up with both the I/O shield and the stand-off screws. The easiest thing to do is to lower the motherboard into the case at a slight angle with the ports pointed down towards the holes they'll be going into first.
Take care to lower it down gently into the case and over the stand-off screws. If done correctly, you should see the holes of the stand-off screws through the holes on the motherboard.
Use the supplied screws to put the correct amount into the holes and tighten the motherboard securely onto the case without overtightening.

Install the power cables
Once the motherboard is installed you can plug in the power supply cables. The two CPU cables connect to the top left of the motherboard. The 24-pin plugs into the right.
Attach front-panel connectors
Every case has front-panel connectors of one sort or another that need to be connected to the motherboard in order to work. These include things like USB cables, audio cables (3.5mm headphone and microphone jacks), power buttons and more.
In most cases, these are already attached to the front and fed through into the case. In the NZXT H7 you'll find them nicely routed on the back of the case, for you to feed through to the motherboard and connect up.
This can be a bit fiddly, but the motherboard's manual is a lifesaver, and should have a clear map of what needs to go where. Each cable is clearly labelled in the case manual as to what it is and in the motherboard manual as to where it should plugin, while individual plugs also often have labels to clarify which function they control. This makes it a bit like following a Lego manual to work out which plug should end up on which pin.

Installing the graphics card
To install the graphics card you'll need to remove two backplates at the top. It's always best to install the GPU on the top PCIe x16 slot as this ensures the GPU runs at max speed.
Looking at the graphics card, you'll find the connectors that fit into this slot are on one side and require you to install the graphics card with its fans facing down towards the bottom of the case.
Before you slot it in you need to remove two covers from the rear of the case. This is a strip of metal held in place with screws. You'll need to remove two of these in order to fit the connectors through the back of the case so you can plug them into a monitor.
Another important, if tiny note is to make sure you take any protective covers off the GPU's ports before you install it - these will be fiddly to fish out once it's in place!
Now you can put the graphics card into the slot. Line up the connectors with the holes. You'll note there is a small one next to a longer one, so it's impossible to install this component incorrectly, but don't force it.
Once the graphics card is slotted into the motherboard, you can screw the thumbscrews back into the holes - through the metal plating on the back of the graphics card - this will help hold it in place.
Cable tidying
Now your build is nearly finished you can try to tidy up a bit and make sure everything is neat and tidy. This is worth spending time on as neat cables help with airflow in the case and help keep your components cool.
It's worth checking everything is properly plugged in before you get to tidying. Plug your PC into the power and turn it on to make sure it boots up without touching the insides.
Motherboards have lights and sometimes speakers for letting you know that everything is running ok. Check all the fans are spinning as they should be. Especially on the cooler.
If it all works, turn off and unplug the PC again. You'll find cable ties with the PSU. Loop cables together and tighten them up so they're held neatly together, although you don't need to lose sleep if the rear of the case doesn't look insanely clean.
Run the cables through the various channels and use the ties and hooks to neaten everything up.

Starting your machine for the first time
Now your first gaming PC is built. Congratulations! But it's not all over yet. You need to install Windows, some games and other software then get to the actual fun of playing games while bathing in the glory of having hand-built your own machine.
Hopefully, you've already seen our guides on the best gaming mice, headsets and keyboards to buy and you've got yourself equipped with those and a shiny new monitor to plug into your gaming PC.
You're going to need to plug those in to get started with the next bit.
- Best gaming mice: The best wired, wireless and RGB gaming mice to buy today
- Best PC gaming headsets: The best wired, wireless and surround sound headsets around
- Best gaming keyboards: The best quiet, loud, colourful and proud mechanical keyboards around
You'll also need another PC or laptop in order to install Microsoft Windows.

How to install Microsoft Windows
Installing Windows 10 is relatively straightforward. You'll need a few things first though:
- A purchased licence key for Windows 10 Home or Windows 10 Pro.
- A USB thumb drive or DVD (note this requires a DVD drive in your build, which we haven’t done) with at least 8GB of free space
- Access to the Windows Installation Media tool
Using the Windows Installation Media tool you can turn your USB stick into a bootable drive - this means you'll be able to run the Windows installation program directly from it.
Run the tool, follow the instructions and install it on your USB stick using another PC. It's worth highlighting that, while it is seemingly possible to make this bootable drive from a Mac, we've tried several times unsuccessfully, while we've never had an issue on a PC. So, if you can, we'd strongly recommend doing this from a PC if at all possible.
Once that's done, plug it into your freshly built PC and turn it on. You'll need to then press DEL as soon as the computer starts up and enter the BIOS. From there, look for the boot menu - this is an order through which the computer tries to load and select the USB drive you've plugged in as the first drive to try. This means when you exit - save the changes and reset - the machine will then load from the USB drive and prompt you to install Windows.
If you don't have access to another PC or laptop then you can buy a physical disc of Windows, but you'll also need to install an optical DVD drive in your PC. Borrowing a friend's computer is an easier option.
Once you've done this the tool will talk you through installing Windows - choose 64-bit and the hard drive you want to install on. Installing on an M.2 drive or SSD will mean Windows loads more quickly every time you turn your PC on.
After a while, you'll be asked to enter the license key and then the install will carry on. Your PC will eventually load Windows and then you'll be away! You'll need to plug in your ethernet cable to connect to your home broadband, then you can start downloading games and setting your PC up the way you want it.
Upgrading your PC in future
As we said earlier, once you've completed a build your PC should serve you well for years to come, but you can also upgrade it by adding various parts. The easiest upgrades are extra RAM and a new GPU. You can also add another hard drive fairly easily if you need more storage. RGB lighting and fan upgrades also make your machine look more snazzy.